Friday, August 31, 2012

How NOT to Gather and Eat Black Walnuts

Smack! Bam!

Thwack! Thunk!

Crash!

Nope.  I'm not quoting a comic book.  Rather, These are the sounds I've been hearing outside every day and night for a little over a week.

The black walnut trees are dropping walnuts at a rather fast rate.  I'm seriously considering donning a helmet every time I go out into my backyard.

Naturally, I wanted to crack one of these walnuts open and have a taste.

First, I had to remove the outer husk.  These husks tend to be green, brown, or green and brown.

black walnuts still in their green and brown husks
A pile of un-husked black walnuts
Generally, the idea is to use walnuts that don't have a pre-cracked outer husk.  This, unfortunately, is nearly impossible in my yard, because the black walnut trees are huge.

As in at-least-one-floor-taller-than-a-2-story-house-with-attic huge.

Yeah, they don't fall without cracking.

And that's when you want to gather them: after they fall.  If you pick them, you may end up harvesting them too soon.

So I grabbed one, went to my table on the porch, and tore off the husk.

It was quite messy. 

They dyed my fingers, fingernails, and part of my palms brown and black.  I thought to myself, 

"Wow!  If I can manage to get it just right, 
I'll be able to use it as a replacement for henna... 
albeit, a different hue." 

I just may try that, later.

In the meantime, though, I had a black walnut to crack and eat.

I tried one of those crab leg cracking tools, a nutcracker, some pliers...

But in the end, I grabbed my trusty rock hammer that I used faithfully throughout my college days.

That finally did it.

Yep.  Those black walnut shells are as hard as rocks.

I then spent a few minutes trying to pry the meaty center out of the shell.  Again, not an easy task. I had to give it a few more whacks.
           Then a few more...

                                      And then some more. 


The result wasn't very pretty.  I ended up with a nice little pile of shell and nut.  I was determined, though.  I would eat black walnut!

I sifted through the rubble, pulled out a small piece of nut, and chewed.

...

       ...

            ...

         Eeeeeeeew!!!!

It was...  not pleasant.

Fortunately, after reading up on it a bit more, I discovered that this was because I made a mistake.  It turns out, after you remove the husk, you're supposed to let black walnuts cure.

What this basically means is that you need to place them on a screen or in some netting of some sort and let them happily dry for two weeks.

I think I may have been a wee bit short of that, but hey!  What's 14 days... right?

As you can imagine, I'm taking everything I've learned since that mistake, and applying this knowledge to my next batch of nuts.

I'll get back to you with that when the curing is complete.  In the meantime, learn from my impatience...

This is not how to gather and eat black walnuts!


Thursday, August 30, 2012

Garden Grain and One Tiny Cookie

Artisan breads!  Cereals!
Cupcakes!  Cookies!
Dinner rolls!

I twirled around my backyard, no doubt causing the neighbors to fearfully peek out their windows in an attempt to figure out what 'that crazy lady next door' was doing.

Happy I was, because yet again, I made an interesting discovery:

I know what the grassy stuff in my bird seed garden is!!!


W  o  o  h  o  o  !  !  !

It's wheat!  That's right... soon I'll be staring out at 'amber waves of grain'!

Well, ok, an amber wave of grain...

Alright, already!

A couple of stems with a few grain heads poking out of them.

But that's still pretty cool in some small-scale, crazed pseudo-scientist way, right?

In reality, there won't be enough grain to produce much of anything... except maybe one cookie.


That's a bit of an exaggeration, isn't it?

Ok, in reality...


But, hey!

                                ...it's still a cookie!

Right?

Wednesday, August 29, 2012

Fall is in Full Swing!!! ...In Summer?

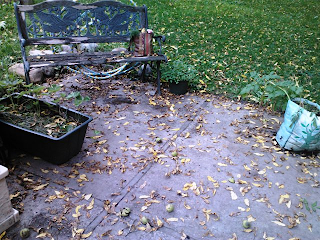
Fall is in full swing!  The leaves are falling in bursts throughout the day.  Every morning I walk outside to a fresh yellow carpet upon my back porch.

yellow leaf carpet on porch


Just one problem.

It's 
still 
summer.

Oh, boy....

The leaves are falling like crazy, and it happens in waves.  It's like the trees all coordinate with each other and, regardless of breezes or lack thereof, fall from the trees at the
                                                                                          exact
                                                                                               same
                                                                                                     time.

It's really quite creepy.

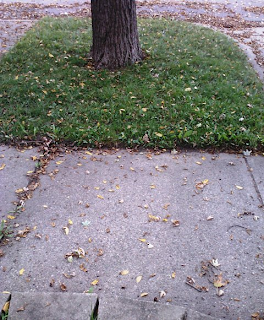
But that's not all.  Here's the black walnut tree that I keep my suet feeder attached to in my front yard, right beside the street:

fallen leaves all over

Yellow leaves galore, right?

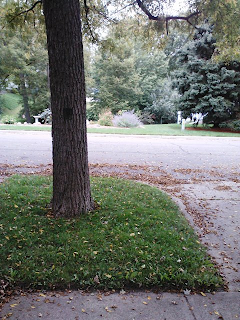
Ok, now let's change the camera angle:

My personal fall - neighbors have no leaves

My neighbors across the street have no leaf fall at all.

Nothing.

I have my own personal Fall! Sweet!!!!

Why is this happening, you ask?

I asked the same question.  It all has to do with a single type of tree.

You guessed it. My arch-nemesis...

The Black Walnut.

At first, I thought there was something wrong.

You do not, after all, expect to watch a steady fall of leaves in the summer.  That's crazy talk!  I figured the trees were suffering from some sort of disease.  Especially since no other trees around me were losing leaves.

After paying attention to other people's yards when walking to the grocery store or the farmers market, though, I noticed that this was occurring at various points throughout the neighborhood:

Points that had black walnut trees!

It appears that black walnut leaves fall earlier than usual.  If not, then there's some funky climate problem occurring here that especially zeroes in on the black walnut trees.

I'm guessing it's the former reason, rather than the latter.

What do you think?  Any alternate ideas on how I managed to get lucky enough to have fall... in summer?


Tuesday, August 28, 2012

Onion Bandit or Success Story?

I looked out the window and down into my front garden.

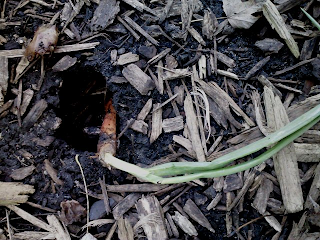
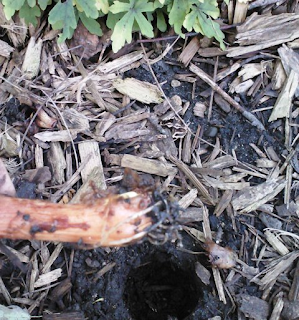
There was a hole.

Where was this hole, you ask?  It was where I had planted the basement onion so long ago.  I could see the limp onion leaves that were clinging to the edge of the big vacant space.

onion hole

I had...

An Onion Bandit!!!

Some critter had ruthlessly absconded with my onion, leaving nothing but the tops of the plant!

How dare he?!

Furious, I began to come up with intricate plans to stop the bandit from ever attempting such horrible thievery

ever

again.

weighted critter trap


But then I removed what was left from the hole and looked a little more closely.


onion root regrowth


It appeared I didn't have an onion bandit, after all!  Upon closer inspection, it seemed that the original onion had decomposed in order to make way for the growth of a new onion.  Tiny roots were shooting out from the remainder of the bulb.

I stuck it back into the ground and covered it up.

I wasn't convinced of this idea yet, however, so I went to the other onion that had been planted in the raised garden of the backyard, and dug that up.

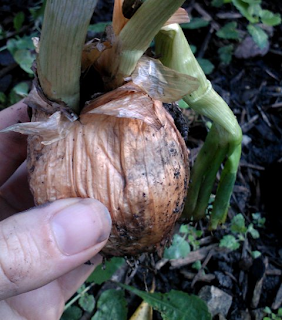
wrinkly, hollowed onion bulb

If you're wondering why the leaves look so sickly, my daughter became a wee bit overexcited about the garden.  She "cut the grass", which means that she took the tops off of all of the onion leaves, then she pulled everything out by the root:  "It's ready now!"

Naturally, I replanted it all.  It takes time to nurture something that's been beaten up like this poor onion, though, so it still looks rather... sad.

And then, of course, I just pulled it from the ground again...

Poor little guy.

Anyway, I noticed that the bulb was not only wrinkly, but also somewhat hollow, so I decided to see what it looked like on the inside.

twin onions from original bulb

I had twins!!!

Woohoo!!!

It appears that planting an onion that has managed to grow so much in your basement that you don't want to eat it truly can work.

No waste!  Indeed, doing this can actually cause you to gain an extra onion in the process.

And then you replant the bottom section of one of those to gain two more onions.

And then do it again.

And again.

And...

You get the point.

How awesome is that?  Imagine never having to buy onions again.  A gardening lesson in self sufficiency!

They can be grown in pots, after all, so you don't even have to stop during the winter.  I think I've just found my happy place.

How about you?


Monday, August 27, 2012

Miniature Dragon Tracks Spotted!

I have a miniature dragon living in the backyard!!!

I have it all figured out, you see. 

Some poor, unfortunate bird landed in the wet sand.  It moved forward and dipped its beak into the cool, moist soil, retrieving a fat earthworm.

Then, the dragon leapt out of its hiding place deep within the soil.

Like in the movie Tremors.

RAWR!!!

The bird never had a chance.

Feathers and bird tracks were all that remained of it, as the miniature dragon crawled away, dragging its full belly across the dirt.

Content.

No, really.  I have proof.

See?

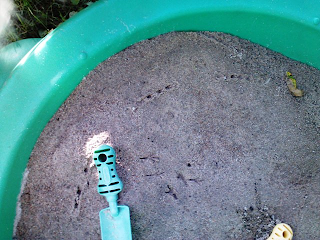
2 sets of animal tracks in green sandbox


...what?

You doubt me?!

The evidence is right there.  In the green sandbox.

The bird tracks are very obviously in the center, and the dragon tracks go along the edge of the area, three indentations, then a wide space, then another three indentations, etc.  A perfect repeating pattern.

It's a miniature dragon, obviously.

Duh.

What?  You think it's something else?

You reject my perfectly rational, soundly logical, scientific observation? 

Yeah, me too.

The thing is, I have no idea how to figure out what that trail is.  The central prints are very obviously bird tracks of some sort, but what is that other trail?

Any ideas?

This is a really good excuse to head off to River Bend Nature Center again, I think.  No doubt, one of the naturalists will take one glance at my photo and instantly know the correct answer.

Until then, though, it's the trail of a miniature dragon.  Unless, of course, you have other ideas?


Sunday, August 26, 2012

Farmers Market Happiness - The Hula Way!

"Mommy, look!  There's feet under there!"  

My daughter giggled and pointed to our right.  We had just entered Central Park to gather this week's supplies from the farmers market.

Sure enough, I saw some bare feet poking out from beneath a tarp that was being put together.

Searching through my mental filing cabinet, I remembered that day was the Faribault International Festival.  My daughter and I arrived at the park about 20 minutes before starting time, so all we could see so far was people setting up.

That was ok, though, because we had some shopping to do.  Again, funds were low, so I had to do a lot of comparative shopping within the farmers market.  This time, I walked in with $18.  I really hoped I could get everything I needed!

So what kind of treasures did I gain this week?


1 pound of tomatoes
1 loaf of poppy seed bread - that stuff is amazing!!!
1 yellow patty pan squash
1 broccoli
1 gigantic bunch of carrots
1 black plum kolache (eaten long before we got home)
2 cucumbers
6 red potatoes (5 of them were huge)
12 eggs
A ton of strawberries!

The amazing find today was the strawberries, of course!  What you're looking at isn't the full amount... it's just what I had left by the time we walked home.  My daughter ate at least 4 in that time, and maybe more.  Very sweet fruits, which had me dancing for joy.  I'm used to having to dip strawberries in vanilla yogurt to make them sweet enough for my palate!  I spent two dollars on this huge amount of goodness, which is way less than average!

The yellow patty pan squash was something new to me.  It's a little smaller than the standard size patty pan, which was actually great since I've never eaten a patty pan squash in my life!!!  That being said, any recipe suggestions would be welcomed.  I have no idea what to do with it!

Once I was loaded up with yumminess, it was time to leave the farmers market.

I walked past the last vending table and stood stock still.  I was mesmerized by an overwhelmingly awesome sight.

See the bare feet?  She's the one we saw setting
up when we got to the farmers market!

No, she's not just holding the two hula hoops that you see held out in front of her.  She's twirling them.

Around her wrists and hands.

Ok, but that's not all.  She twirled these hula hoops all along her body.  Hands, wrists, arms, chest, waist, legs... you get the picture.  If it was possible to use a part of her body to get those hula hoops moving, she did it.

And she did it with style.

This wasn't the type of hula hooping that you see kids do in the yard.  This was a dance.  This was gymnastics.  Well, heck... it was both, and it was riveting!  I literally couldn't turn my eyes away from her!

She even jumped while twirling her hoops!  Wow!!!

Now, she didn't just perform with her hula hoops.  All of those hoops on her left were ready for excited festival goers to use.  Some people, like me, just watched her, enthralled by how beautiful and amazing her talent was.  Others ran up to join her.

Naturally, most of the people that had that kind of courage were under the age of twelve!  Somehow, you just have more confidence when you're that young - "What she's doing looks fun!  Woo!!!  My turn!"

As you can imagine, we didn't leave the park for quite a while, choosing instead to take part in all of the action around us!


Saturday, August 25, 2012

Tea Tree Oil for Tooth Pain

Yep, you read that correctly!  I've made another tea tree oil discovery.

Hooray for this medicine cabinet in a bottle!!!

In this case, there is one simple, very important ground rule:

DO NOT drink the tea tree oil!!!

That's right.  Don't drink it.  If you have problems with accidentally swallowing your mouthwash, this natural remedy is not for you.

That being said...  let's talk about just how awesome tea tree oil is if you're suffering from tooth pain.

Tea tree oil has antibacterial properties.  

Generally speaking, the reason a person has tooth pain is because bacteria has invaded a cavity or sore in the general area.  Remove the bacteria and you remove the pain.

A while back, I made a very unfortunate trip to the dentist.  This was a new dentist that I knew nothing about.  I swiftly learned, however, that she was very good at both taking care of the problems I had, and creating new ones.   This, of course, didn't instill a great deal of confidence in me.

I've been plagued with toothaches ever since that visit.

Thankfully, I've gotten them under control now, due to the use of tea tree oil.

It's important to note, however, that tea tree oil isn't necessarily the safest product to use in your mouth.  At all.  It works, but if ingested, it can cause some very severe side effects... like dizziness, rash, confusion, and really nasty stomach problems.  So again, I repeat:

DO NOT drink the tea tree oil!

The process is very simple.  In the case of tea tree oil, a little goes a very long way.  Add a couple of drops to your favorite mouth-rinsing cup, and fill with water.

- Swish the mixture around in your mouth, being very careful not to swallow, then spit.  Repeat this until there's nothing left in the cup.

- Rinse the cup, then fill it with a bit of water again.  Swish and spit a few times.  You don't need to fill the cup - just use enough water to help you get rid of that nasty tea tree oil taste.

Because, yeah...

It's really gross.  The good news about that, though, is that it'll help remind you not to drink it.

I found that by using tea tree oil, my tooth pain was gone within minutes, the bacteria quite effectively killed. It tastes horrendous, but it works... even for overwhelming I'm-about-to-cry-from-the-agony tooth pain.

Grossness factor aside, I've never had any side effects when using tea tree oil in this manner.

If, however, you're one of those people that constantly swallows their mouthwash, you may not want to try this.  While I don't think you'd be in any serious trouble after swallowing a mixture of a couple of drops of tea tree oil in somewhere around 6 ounces of water, I'd rather you not test that theory.

I should also mention that the medical community specifically mentions that tea tree oil shouldn't be used on pre-pubescent boys at all, in any manner - even topically.

I didn't see an explanation of why, but I figure it's better to be safe than sorry.

Of course, on the flip-side, I think it's probably safe to assume that nobody reading this would try to use a remedy that isn't safe to drink on a child, when that remedy goes straight into their mouth.  That would just be... well... stupid.

That being said, tea tree oil does work, quickly and effectively, as long as you carefully ensure that you:

Do not drink the tea tree oil!

I know, I know... a bit of overkill on the warning there, right?

Friday, August 24, 2012

Even Green Boots Will Have a New Look

My discussion today is going to be a bit off track from normal.  No gardening, no DIY projects, and no tips to help in the quest to go green.

Told ya... I'm way off track today.

What in the heck am I thinking?!

I'm thinking that you, as an important part of this blog, have the right to know when changes are afoot.

The thing is, my green boots are going to have a sparkling new look in the near future, and I didn't want that to scare you into thinking you've managed to land on someone else's blog.

No, I'm not changing my concept.  Even Green Boots Leave Trails will still follow me on my quest to become more environmentally responsible, and I'll still talk about my successes and failures in that regard.

None of those things will change.

Rather, I wanted to warn you that the look of this blog will probably be vastly different. 

See, I've discovered errors in the template I use.  For those of you that don't know what a template is, think of it as the skeleton of my blog.  The pictures and words you look at are the organs that fill in the skeleton.  If the skeleton isn't built well, you end up with a big pile of mush.


Nobody likes that.

My blog's skeleton has a lot of problems.

I'm not talking about just one or two of them.  I mean a lot.  Like, over a hundred.  To top it off, none of the errors were made by me.  They're all coding errors.

Well, ok... I made a few of the errors, but the ones that I'm most concerned about are beyond my control.

While learning how to fix these errors would be a great achievement for someone like me that knows very little about the coding end of a blog, I have to be honest with myself.  I don't have the time that's needed to truly grasp these technical concepts.  Doing so right now would not be in our best interest.

Fortunately, there are plenty of people out there that do know what they're talking about, and have created their own blog templates.

Until I have the time to delve into learning how to fix these mistakes on my own, I can stand on the shoulders of someone who already knows the concept.

Someone whose intelligence and reliability has earned my trust.

Cue Mohammad Mustafa Ahmedzai, writer of My Blogger Tricks.

Every time I've had a Blogger specific problem, he's had the answer.  More than once, his knowledge and ability to explain how to repair problems has saved me a great deal of heartache.

I also discovered a few days ago that he has some truly amazing free templates that can be downloaded by his blog's subscribers.  I'm considering using one of those very soon.  I just need to figure out how to tweak things like colors and font so that they work for Even Green Boots Leave Trails.

So what does this mean for you?

It means easier navigation of my site.  It means a cleaner look.  It may also mean faster loading times for those of you with slower internet speeds.  My page loading time is pretty decent right now, but cleaning up stuff on the technical side will definitely be of benefit to you.

So don't worry... Even Green Boots Leave Trails will still be the same blog, with the same focus.  It'll just be a bit more enhanced  for a better reading experience.  I just feel you have the right to know about any large changes I make.

This blog may be about my experiences, but it's written for you.


Thursday, August 23, 2012

Male and Female Blooms? What's the difference?

It all finally makes sense!

Everything I had ever read just seemed like gibberish:

"It's so easy to tell the difference!"

"The blooms with a bulbous base are the females."

Yeah, so... since planting my first squash varieties this spring, I had never been able to tell the difference between male and female blooms on a squash.  They all looked the same to me.

I was really beginning to feel like an idiot.  

If it was so easy, why couldn't I tell the difference?  Was I really that inept at spotting changes?  I mean, I always did pretty well on those games in which you spot the differences in two photos, so I couldn't be that bad... right?

Well, it turns out that my problem came from the fact that everywhere I looked, nobody had ever shown a picture of the difference between male and female blooms.  I mean, I'm sure they're out there... I just hadn't seen any.  This, of course, makes all the difference in the world.

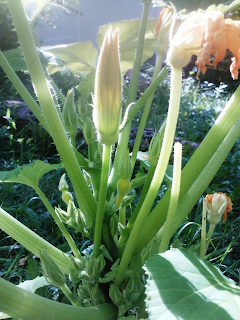
Here's a picture of the main stem of my crookneck squash that has been in continual bloom since the last time I mentioned it.  The flower buds grow out from that central stem.

male and female flowers with a male in the foreground

The flower that's near to opening is male.  Indeed, most of the flowers on my squash are male.

All I had ever seen were male blooms!  

That's why I couldn't tell a difference... there wasn't any difference to speak of!

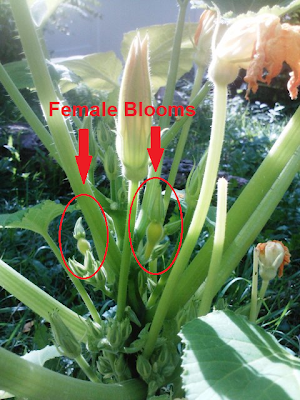
This squash, however, is starting to produce female flowers.  They're the ones with - sure enough - a bulbous base, as indicated in the picture below:

female squash blooms with bulbous base

It all finally makes sense!

My grey zucchini had only produced male blooms before its untimely death, which is why everything always looked the same.  Even with my cucumbers, which have been producing fruit, I had only seen them after the blooms had already opened, due to their location in the wild area of the yard, so didn't have any point of reference.

This crookneck squash, however, has not yet opened its female blooms.  Because I planted the seeds in a container, I've been able to note its progress daily, which is why I can finally see how different the two blooms look.

As you can imagine, I breathed a huge sigh of relief when I discovered that there's nothing wrong with my ability to see a difference that's so obvious to people.

Have you ever been frustrated with your inability to see something that's perfectly obvious to others, only to find out that it was simply because you had never been exposed to the difference in question?  Was your relief as great as mine?


Wednesday, August 22, 2012

Branches, Saw Issues, and LOTS of Sweat

It's been weeks since I started building my sister's birthday present.  There's nothing more fulfilling than giving a gift that was created via your own blood and sweat.

Unfortunately, her birthday just recently passed.

And I'm still not finished.

I should have stuck with gardening, like with my other sister's mother's day present.

I'm lucky, though, because she understands that a present that comes directly from the heart can sometimes take a little longer than expected, due to unforeseen difficulties.

And, wow... difficulties there have been... from the very start.

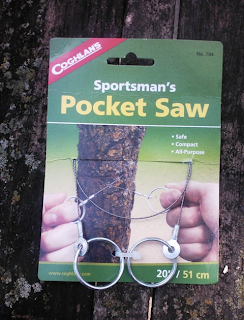
I grabbed a huge pile of black walnut tree branches that I had collected over the past couple of months.  I thought it'd be great to try to use a pocket saw to cut the branches I was using for the project.

pocket saw


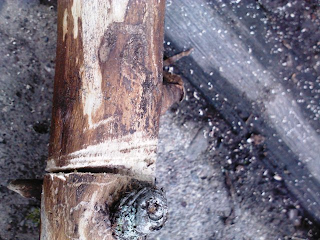
I mean, how cool is that?  Such a tiny piece of equipment that can be used to fell branches just screamed for me to use it!  I'd loop a saw that's basically a thin wire around a branch and swiftly pull back and forth to produce a nice, even cut.  It seemed to work quite nicely.

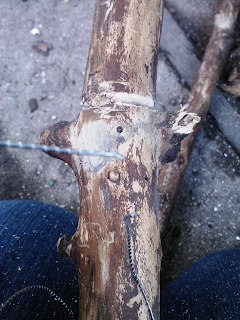
even cut in walnut tree branch


Unfortunately, once I got a nice rhythm going and could smell the overwhelmingly beautiful scent of fresh sawdust, a slight problem occurred...

Pocket saw snapped apart


Snap!

The wire snapped in half, and I was left with a mostly, but not quite complete cut.

A small problem.  Nothing I couldn't handle, though...  So I went searching for our hacksaw.  After a while, I found it, and set to work cutting the branch.

After a while, I realized that it was taking far to long to get that branch cut, so I inspected the blade.

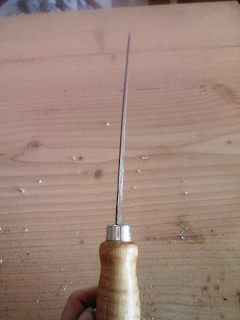
bent hacksaw


Seriously bent, and horribly dull.  I breathed a sigh of relief, glad that the problem was the tool, and not the user.

I decided it was time to find myself a cheap power saw.  Of course, I have no idea what 'cheap' means in the power tool world, since I always keep myself safely cocooned with simple tools:  hammers, wrenches, pliers... the simple stuff.  Zero environmental impact, since no energy is used, aside from brute force.

I mean, sure, I have an awesome drill, but anyone can use one of those with zero difficulty.

A saw, on the other hand...

Wish me luck!

Tuesday, August 21, 2012

Pillbugs in the Potato Grow Bag. Oh, My!

Armored bodies scurry across the soil of my potato grow bag on 14 legs.  Not just one body.  Or two.

Or three.

There are many of them.  Tiny babies, half the size of the mature form.

Pillbugs.

Pill bugs

Obviously, that picture didn't come from the potato grow bag.  Sadly, due to color similarities, the pillbugs kept blending in with the soil, so this was the best I could do, unless I wanted to tease you with a game of Where's Waldo: garden style. 

I took this picture looking down on a cooler.

Yesterday, I talked about the ants that had overrun one of the stems on my potato grow bag.  This, I believe, is due to the fact that I wasn't giving the potatoes nearly enough water, which was very surprising to me, because I didn't neglect the grow bag.  Sure enough, though, when I checked the soil, it was drier than I'd like it to be.

There were also pillbugs.  Now, there weren't nearly as many as I had found in the cinder blocks that I turned into a cinder block garden, but there were still enough of them to cause me some concern.  I worried that my potato grow bag may be a failed endeavor.

So I did a bit of research into pill bugs.

I already knew a small amount about them.  For instance, pillbugs aren't really bugs... they're crustaceans, just like crabs, shrimp, and lobster.  Don't try to eat them, though... evidently, they taste like pee.  I watched a documentary a few years ago in which a student fried them up and ate a bit.  Not exactly a four star meal.

I needed to learn more, though.  While the knowledge that pillbugs taste like pee is amusing, it's hardly relevant to the problem at hand.

What I did find that was helpful was a description of pillbugs from Northern State University.

Pillbugs are attracted to decaying plant matter.  This is why you'll find them under piles of leaves after it rains.  Since I mulch my potato grow bag with fresh cut grass, in order to give it a fertilizer boost, this makes perfect sense.

It's no reason to be alarmed, either.  Unless there is a huge pillbug population, any mature plant will be left unharmed.  Seedlings could be destroyed, but something like my potato plants is perfectly safe.  Pillbugs are a sign of healthy soil.  Yay!

The information from NSU taught me an additional benefit to pillbugs that I never would have known from simple observation.

"They are capable of taking in heavy metals such as copper, zinc, lead and cadmium and crystallize these out as spherical deposits in the midgut."

Translation:  They eat heavy metals and poop them out, thereby helping rid the soil of contaminants.

Sweet!!!

These guys are helpful, rather than harmful.  They've been used to clean sites that have been seemingly destroyed by mining and mineral waste.  This process of theirs also removes contaminants that would otherwise end up in the water table.  How cool is that?

Mother nature at work, making our world a little greener.

In conclusion, pillbugs are awesome... except as lunch.  That's just gross.

Monday, August 20, 2012

Ants In My Potato Grow Bag!

"Argh!!!  No!!!!!!!!  What the heck?!"

"What's wrong?"

"I'll call you later!"

Click.

It's a good thing most of my phone calls don't end this way, right?

I thought my potato grow bag was doing well.  I really did. And, well... for the most part it was.  Except that I ran into a wee little problem that I was not expecting.

Ants.

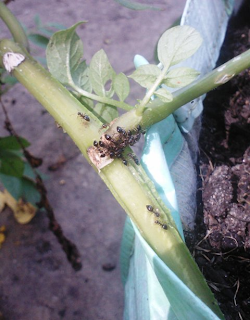
ants devouring the base of a potato plant stem

A lot of ants.

Leaning in closely, I was able to see that they were tearing off an entire branch of one of my potato plants.  I followed the trails that were made, leading away from this point, hoping that I could discover where the ants were coming from, yet I kept losing them.

Poof!  Just like that, I'd lose the trail.

Whenever I have a problem with my garden, I always try to find out why the problem occurred.

Therefore, I ran to my computer to see what could be discovered about voracious ants that are driven to lay waste to potato plants, with the specific intent of causing me mental anguish.

That probably wasn't the best idea for a search term, so I narrowed it down to 'ants attacking potato plants', and went on from there.  In the end, I discovered that most people seemed to care so much about getting rid of the problem that the majority of my results had to do with throwing chemicals at the problem, rather than finding out why the problem even occurred.

Now, this is great if you have a one track mind - kind of like those ants - but does nothing to ensure the problem doesn't arise again.

Thankfully, I discovered a few gardening forums from the UK that did talk about why this was happening.  That's right - I had to go all the way to another country to find my answers.  Don't get me wrong, I'm sure there were a few American sites that had the information, they just weren't as easy to find.

It all comes down to water.

I thought I was watering my potato grow bag enough, but upon placing my hands inside the soil, I discovered that the medium was a bit more dry than it should be.  Basically, my potato grow bag was filled with the exactly appropriate level of dryness for ants to happily build a nest.

This explains why I lost the ants every time I tried to follow a trail.  No doubt, they were entering their nests somewhere along the edge of the grow bag.

Fortunately, I don't have to throw chemicals at the problem to take care of it.

The problem occurred due to a lack of water.  Therefore, giving the soil ample moisture will cause them to become uncomfortable with their living arrangement, and they'll begin to look for a new place to build a home.

I can speed up the process by sprinkling some cornmeal at the base of the plant, as well.  In theory, they'll take this treacherous peace offering.

Why treacherous?  Because they can't digest cornmeal.  It'll kill them, tearing them up from inside.

Eew.

I'm actually hoping that the water alone will work.

Remember my baby powder response to the ants that were coming into the house through my doorway?  It's the same basic theory.  The difference, though, is that while they avoid the baby powder due to recognizing the danger, the cornmeal is... well... yummy.

So they take it.  The ant version of a trojan horse.

Have you had problems with ants in your garden?  What caused your problem?  How did you handle it?

Sunday, August 19, 2012

This Weekend's Farmers Market Haul

"Just like Grandma's!"

"What in the heck is that?!"

"Wow!"

These are just a few of the things I said while at the Faribault farmers market, or soon after the walk back home.  Yesterday's farmers market visit was most definitely a good one.

I came out with a surprisingly good haul.  I may not have to go back to the grocery store for any supplemental produce at all this week.  The farmers market plus my own edible garden should provide everything I need.  Hooray!

So what did I get?

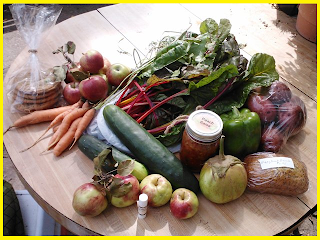
huge farmers market haul


1 loaf of poppy seed bread
1 eggplant
1 large bell pepper
1 jar of peach salsa
1 heavy bag of red potatoes
1 bunch of carrots
1 tube of butterscotch lip balm
1 bag of rainbow swiss chard
2 cucumbers (one is the size of my forearm!)
3 pounds of apples
6 cookies from Kristi's Cravings (Doesn't really matter which kind... all of her cookies are yummy!)

Not pictured: a small, handmade headband for my daughter.  I've been needing to get a headband for her for a while.

Huge haul, right?

My market haul was even better than I expected.  I didn't need to buy eggs today, so I had a little money to buy something that I normally wouldn't.  That's why there's lip balm, a non-food item, on my list.  It won't be long before I need to get some, and how can I say no to a handmade blend, knowing this?

Yep.  I totally bought it.  After putting some on to test it, I knew I made the right decision.  Not only was it tasty, but 1 1/2 hours later my lips were still soft (and that's after I licked them like crazy!).

The peach salsa wasn't something I had planned on, but the salsa ladies gave me a sample, and... wow.  It was... wow.  If you ever get the chance to try peach salsa, do it.  I truly didn't expect to like it so much!

The apples were absolutely delicious, and worth every penny I paid.  Firm and extremely sweet, with just a hint of tartness, probably due to their small size.

But what was my ultimate treasure this visit?

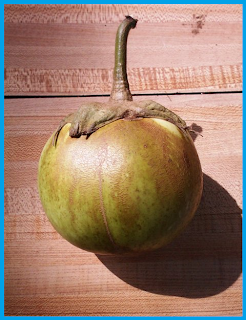
heirloom eggplant

An heirloom eggplant.  Yep!  That's what that picture above is.  I had to ask, because I had no clue what I was looking at.  I purchased the smallest one (which is still a decently large size), because my husband isn't a big fan of eggplant.  Being an heirloom variety, though, there's a chance that the taste will be slightly different from normal, just as the color and shape are.  Cross your fingers for me!

Saturday, August 18, 2012

Basement Onion Project Update - Finally!

How in the world did I manage to forget?!

It's been quite a while since I gave an update on my basement onion gardening project.  A really, really long time.  When last we visited this project, the onion that was planted in the raised garden of the backyard was starting to get comfortable in its new environment.

basement onion fifth day after re-planting
What the backyard onion looked like on day 5
On that same day, however, the front yard's onion was starting to yellow at the tips of the leaves, thanks to the squirrel that thought it might be good food.

basement onion in front yard - tips are yellowing

It's been a few weeks, and the onion in the front yard hasn't shown much progress, at all.  That squirrel really did a number on it when it chose to bite into the bulb root.  I have no pictures of that one, because there's not really anything interesting to report.

In the backyard, however...

onion transplanted into soil from basement - several leaves
Wow!
I'd say the onion planted in the backyard raised garden is doing pretty well!  I have enough leaves that I can cook meals that require green onions without batting an eye.  Success!

Eventually, I'll dig it up and see what it looks like underground.  Will I have new bulbs growing, or will this be nothing more than a really cool plot to go to when I need green onions?

I'm really excited to find out!  This gardening project is already a success, but will it go beyond what I had hoped for?

What do you think?


Friday, August 17, 2012

National Honey Bee Day is August 18th, 2012!

Tomorrow is National Honey Bee day!

The first National Honey Bee Day was on August 22, 2009, so it's relatively new.  I'm rather amazed at that. I mean, really...  What took so long for this to be created?

Oh, yeah... a large majority of people fear them.

There's really nothing to fear from bees, though, as long as you take the time to understand them.  Well, unless you're allergic to them.  I imagine that may be reason for fear.

Or is it?  

Again, knowledge is the path to security.

This year's theme is:

"Sustainable Agriculture Starts With Honey Bees!"

Can't argue with that.

Indeed, part of my reason for allowing so much to grow wild in my garden is to bring honey bees and other pollinators into the area.  Being environmentally responsible means allowing the earth to prosper.  Picking every last weed hinders that process.

My biggest harvest so far has come from the cucumbers that I planted in the wild area of my backyard.  They haven't produced any more flowers than any other plant, but they do get pollinated more frequently, due to the buzz of activity that happens there.

Have a great National Honey Bee Day tomorrow, August 18th, and take a bit of time to learn a bit more about our life promoting friends and the beekeepers that help us enjoy the fruits of their labor.

A few resources that I recommend are:

Vanishing of the Bees:
This documentary studies Colony Collapse Disorder, a growing problem worldwide.

American Beekeeping Federation:
This organization is a treasure trove of facts about everything honey bee related.

And, of course...

The National Honey Bee Day home page!

Obviously, there's a lot more amazing resources than this, but these will give you a great start!

And now I'll leave you with what is quite possibly may favorite photo I've ever taken.  Why?  Because of the experience surrounding it!

Bee swarm at rest

I was four feet away from this swarm, and not one bee stung me.  Why?

I was armed with respect and knowledge.

Now go arm yourself, as well, and enjoy the day tomorrow!

Project: Bird Seed Garden?!

Totally crazy.

Absolutely bonkers...

Or maybe just full of a larger amount of curiosity than usual?

I kinda like that last option, so let's go with it!

A while back, a squirrel decided to get into my salvaged bird feeder.  

Naturally, bird seed was scattered everywhere, and the feeder was...

Well, let's just say that it's time for me to come up with a new use for it.

In the beginning, I spent a lot of time trying to pick all of the plants that grew from the seed that was dumped all over that side of my raised garden.  I then realized, however, that it was going to be a never-ending process.  I'd danced to this tune before in the desert southwest, and knew that unless I actually removed the soil it would be an exercise in futility.

But then I realized something.

There was nothing growing in half of that area, aside from a low-lying ground cover that had been planted before I moved here.  My peas were damaged so much during our heat wave that I allowed them to die in peace. That left a huge void in the garden.

And I despise garden voids.

The birdseed was growing, on the other hand, and was healthy.  Many of the seed that is found in a bird seed bag is edible and pleasing to humans, as well.

Why not allow some of the bird seed to grow in my edible garden?

It would be interesting to see how it all turned out, so I allowed the plants to grow.  No thinning.  I allowed them to use the survival of the fittest method to sort themselves out.

bird seed garden

You can still see the dead pea vines hanging from the frame.  I really need to remove them, but I had been hesitant to do so until I figured out what I wanted to put in their place, because I wanted the dead root structure to continue feeding the soil - as well as reduce erosion.

Looks like the squirrel decided what to plant for me!

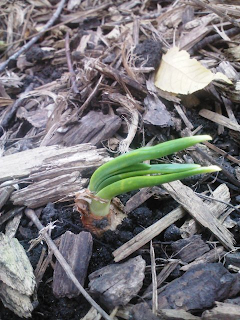
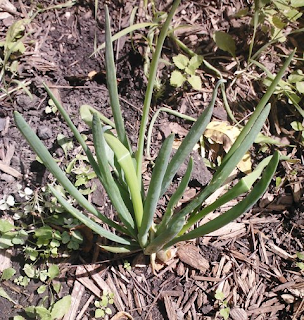
I have no idea what the long, grassy leaves are.  

I haven't seen any of them as sprouts with the seed casing still attached.  What I do know about them, though, is that they're very strong.  If you take just one of those plants and braid the leaves together, you have a pretty strong, thin rope.  I may use this knowledge to lash together some of the black walnut branches I collected.

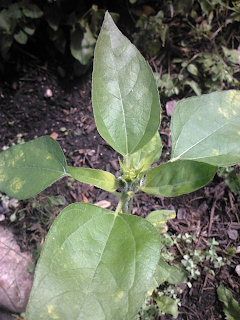
The other seed that has decided to grow is black sunflower seed.

I got positive identification when I had to pull one of the seed casings off of a seedling.

young sunflower

It's a rather short sunflower, standing less than two feet tall, but it's healthy, and already producing a flower bud.  Being a sunflower seed fanatic, I'll allow this one to produce yumminess for me!

The grassy leaved plants, on the other hand, will need to be removed before they get to that point.  They're rather fast growers, and I can easily see them taking over the entire raised garden.

I mean, sure, I'm enjoying this bird seed garden project, but I want it to be rather small, and easy to manage.

Have you ever ended up keeping plants that sprout up from seeds in a location that they shouldn't have been?  What were yours, and how did you take advantage of them?


Thursday, August 16, 2012

Deceptive Vines With Plump Berries

At long last!  Finally, I can figure out what in the world these vines are!  

The drums roll, the trumpets blare.  I gaze at the beautiful blue berries, wondering if there's any chance that these are edible.  I dream of pies, of jams, and of berries popped directly into my mouth.

Armed with photos, I race to my computer.  I now have plenty of pictures to make my discovery with.  Using the leaves, the berries, and even the vines themselves, I can narrow my search.

I know that I was wrong about these being grapes.  I knew it from the moment that the leaf buds produced whorls of five slender leaves with jagged edges.

But what were they?

Well, it actually took me quite a while to discover the answer to that.  I started by trying to identify the berries.

deceptive blue berries


The blue berries were absolutely gorgeous.  They were plump, firm, and round.  The fact that the color of the area by which the fruit attached to the vine was red felt like a great way to help determine what it was.

I was wrong, though.  See, it may have helped quite a bit, but I have no idea what that red part is called.  To me, it's just 'that red part'.

Not exactly scientific terminology.

I came up dry.  Even searching through images by keyword gave me nothing.

I decided to put that photo away, and try to identify the vines by leaf.  This is how I've been able to match several other plants in the past, after all.  I know a lot more about leaves than I do about berries.

five leaves on each leaflet

The leaflets produce  whorls of five leaves with toothed edges.  The entire mature leaflet expands to between five and six inches, depending on which vine I look at.

I was on the hunt.  Unfortunately, everything I was brought to came to a dead end... again.  I was beginning to want to pull my hair out in frustration.

Fortunately, in my frustration I began to repetitively cycle through all of my images.  

Not because I thought I may accomplish anything by that, of course...  Rather, it was because letting the images cycle quickly in front of my eyes was producing a rather welcome catharsis.  You know, like clicking the tv remote again and again, until just about everyone in the house is ready to strangle you.

While cycling through everything, I suddenly stopped.  I stared at one photo that simply showed the vine.  The vine that originally had me thinking that I might have grapes growing in the yard.

clearly vitaceae

If the vine's structure looked so much like grape that someone who grew grapes could get confused, maybe there was a reason for that.  I mean, besides the wishful thinking aspect.

While genus and species were useless to me, and wouldn't give me any valuable information, I may still be able to use taxonomy to help me.  I thought back to my favorite mnemonic device from high school:

King 
Phillip 
Came 
Over 
For 
Great 
Se...

Skittles.  Yeah, he came over for great skittles.  Hey!  I'm a family friendly blog, remember?

Since I didn't want to go through genus and species, which would lead me to nothing of use here, I backed up one more, to F.

Family.

The grape family is vitaceae.  

All plants within this family are woody plants, most of them including vines and tendrils.  Score!  I threw this into a general search using other factors I had already discovered, and finally was able to make a match.

What I have is Virginia Creeper vines (Parthenocissus quinquefolia) - something a desert rat like me wouldn't have any experience with.

Sadly, I can't eat the berries.  They're poisonous.  I'll also need to be on the lookout for poison ivy, since the two plants tend to grow together quite often.

The good news?  Come fall, the leaves will turn a gorgeous red color.  Not only that, but the huge presence of cardinals and woodpeckers in my yard may actually have something to do with the presence this vine, since they use it as a food source.

Looks like I managed to help improve the backyard habitat I've been trying for without even knowing it.  Simply by leaving these vines alone.  Bonus!

Wednesday, August 15, 2012

Ripening Tomatoes! Finally!

Salsa!  BLT sandwiches!  Spaghetti!  There are so many things I can make!!! 

I gazed lovingly at my freshly picked cherry tomato.  It was bright red, unblemished, firm, and beautiful.  I knew that this first tomato wasn't nearly enough to create any of the recipes I mentioned above, but I like to dream big.

Ripe cherry tomato

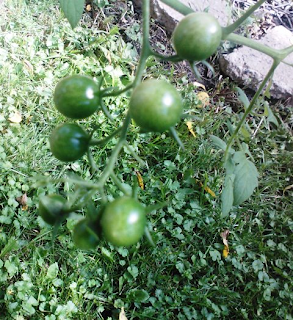
As you can see, I moved my spaghetti garden from its original spot on the porch.  While the herbs were doing well in that location, the tomato plants weren't getting nearly enough sunlight.  The tomatoes did a great job of growing, but they weren't ripening.  They insisted on staying green.

Within 2 days of moving the spaghetti garden into the area beside the backyard fire pit, however, they all showed signs of ripening.  That area gets a lot of sun, and the fire pit isn't used very much, so the location was ideal.

The tomato pictured is the only one that has ripened at the moment, but there will be more to follow.  At last count, I had 21 tomatoes growing, all in various stages of growth.

Some have reached the perfect size, and are beginning to show signs of ripening.

full size cherry tomatoes, not yet ripe
Note the slightly yellowed hue

Others are still itty bitty, and radiantly green.

very young cherry tomatoes

The fact that they're all ripening at different times is something that I'm very glad to see.  Can you imagine 21 tomatoes ripening all at once?  That's a lot of fruit to have to use in a short amount of time.  Sure, I could make a sauce using that many, but I like to eat my first harvest raw.  It kind of emphasizes to me that I've done well.

You know... kind of like the caveman that waves his flaming stick in the air immediately upon creating fire.  Same emotion.

Same amount of triumphant grunts and roars, too, I admit...

All of this would be exciting enough, but there's one additional thing I should mention that makes my excitement even more overwhelming.

I still have blossoms in some areas!  This cherry tomato plant is going to be a huge producer!


Woohoo!!!


Tuesday, August 14, 2012

Jalapenos: A Lesson in Fear of Failure

I've been holding back on you.

That's right... I've totally neglected to tell you about one of the plants in my edible garden, and I did it on purpose.

I must be nuts!
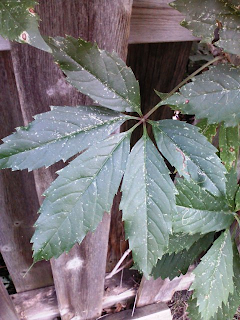
I planted some jalapenos a while back.  A very, very long while back.  You'd think that I'd talk about it, letting you know its progress, and yet I didn't.  After a while, I finally asked myself...

Why?

I love jalapenos.  A lot.  All jalapenos, from mild to extra spicy, are enjoyable to me.  At first, that may seem like a good reason to document their growth.  I'd be able to go back through my posts and smile at the memories they brought back to me.

Yet, I held back.  I puzzled as to why for quite some time.

Then it hit me.

What if they failed?

If my jalapenos failed to grow, I'd be stuck with a super-huge reminder of it.  That documentation would be floating in cyberspace forever.... or at least a really long time.  While, in general, I'm glad to learn from my failures, I found that being reminded of such failure when growing my favorite fruit was something I wasn't willing to subject myself to.

Interesting, right?  The woman that thinks failure is awesome falls apart at the idea of failing in one simple endeavor.

Sounds like I need to do some extra soul searching...

The reason I figured out my problem was that I suddenly wanted to tell you all about my jalapenos.  I wondered why that was.  What brought this sudden change of heart?


Because I'll be harvesting some of them soon.  That's right:  I was finally able to mention them because the chances of any failure were slim.

I've always had a problem with growing jalapenos, which I think is part of the reason that my fear was so great.  Prior to now, I had always ended up with one or two fruits per plant.  A very tiny amount, indeed.  I worried that growing them on the opposite side of the country, in a cooler climate, would make things even harder for me.

I was wrong.

Yay!

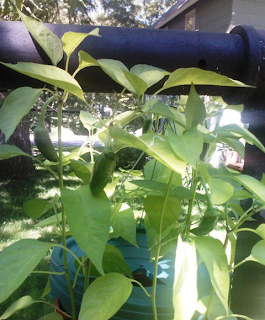
I started the jalapenos from seed at the end of winter, and kept them in a south facing window.  Once they had grown enough, a placed them into a Topsy-Turvy pepper planter that I had gotten on sale for half price. Planting them in-ground wasn't a very wise idea, due to the black walnut trees, so I hung them from the poles of our clothesline, safe in the planter.

The young plants were rather leggy, so I was worried that they wouldn't hold their own weight, but they're doing quite well.


I've lost a few fruits that couldn't get past the initial growth stage. The stems of the new fruits turned yellow, and broke off.

The jalapenos that made it through that point, however, have been growing strong.  I still have more deciding whether or not they'll grow to maturity, as well!

One of the things that may have helped my success here is that the seeds were from a local company, having been produced by Farmer Seed and Nursery Co. in Faribault.  They were harvested from plants that could handle the cool climate of southern Minnesota, as well as the tendency Minnesota has toward cloudy days.

I'm really happy about this success, and I think it's taught me a great lesson:

Don't hide from what you fear.  Embrace the challenge it brings.

Have you ever let fear of what could happen keep you from doing something you know you should do?  Something that would seem petty, or even ridiculous, to the average person?


Monday, August 13, 2012

Thriving Watermelons! How'd That Happen?!
No way!!!  They're actually thriving!

I stared at my watermelon vines in complete disbelief.  You probably remember that when I first planted my watermelon seeds, around three weeks ago, I didn't expect much.  I thought I'd be lucky if they made it very far in their growth.  Having planted them at the very tail end of the planting season, and knowing that they thrive in warm weather, I thought I was totally crazy.

This gardening project, I thought, was doomed to failure.

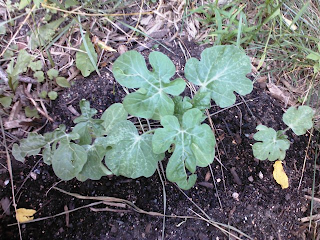
When I first planted them, they were itty bitty things, still confined to the mound that I planted them in.

young watermelon plants in mound

Now, however, the watermelons have taken off in their growth, and one vine in particular has grown over the retaining wall that's roughly 3 1/2 feet away from the mound!

watermelon vine growing over retaining wall

Wow!

Ok, but I said the watermelons were thriving.  Naturally, this means that simply producing long vines isn't enough.  Yes, the leaves are huge and healthy, but there's more to it than that.

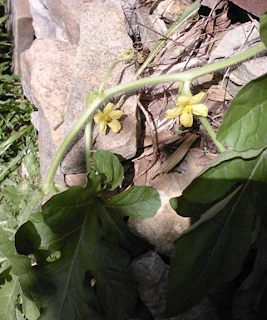
This gardening project has begun to produce blossoms!!!  Beautiful yellow ones!

yellow watermelon blossoms

Now, there's always a chance that the blossoms will drop off and produce nothing in the way of fruit.  I fully realize that.

Especially since the heat wave in our city has ended and we're back to normal southern Minnesota temperatures.  This means that the nighttime temperatures dip into the fifties.  Brrr!  For a desert rat like me, that translates to freezing!  Well, at least for August, that is!

I honestly believe that the whole reason for my success thus far is that the region has been warmer than usual.  Watermelons love warm temperatures, and require a lot less water for growth than any rational person would expect.

Indeed, I watered the mound only a few times, and even then, I used much less water than I did with, say, my tomatoes that are still quite happy in their spaghetti garden.

I consider myself lucky.  These watermelons are really doing much better than I expected.  I'm hoping to get some fruit from them, but even if I don't, I'll be quite content.  Just seeing the large leaves cascading down my retaining wall, accented with spots of yellow, fills me with joy.

And if it does produce?  All the better!  If I'm truly lucky, it'll grow enough watermelons for me to be able to share with the neighbors.  That, after all, is one of the results that I most want to achieve via my edible garden.

Have you ever had an edible plant whose maturity mattered to you even more than the resulting nutrition?

Sunday, August 12, 2012

Farmers Market: The Temptation of Grapes

I actually made it on time, today!  Woohoo!  I'd hate to go through last week's distress, again, even if the last-minute deals were so awesome.

The farmers market is finally in full swing, and the fruit and vegetable variety is overwhelmingly amazing!  There were even a few pumpkins (small, of course) at one vendor's table.  Purples, greens, oranges, yellows, and reds beautified every produce table.

The colorful arrangements caused me to spend way too much time gazing at all of the wares, which means that I didn't do as much cost comparison as usual.  This means I didn't get a very large amount of goods for the money I spent.  Oops.

It was worth it, though.

I was sorely tempted to take pictures of the many tables for you.  Why didn't I then, you ask?

Well, I realized that there would be a lot of pictures.  By 'a lot' I mean somewhere in the ballpark of eight of them.  Plus the weekly picture of my personal bounty.  What's the big deal about that?

Well, you'd spend so much time loading all of the images that you'd have time to take a nap before it was ready!

Ok, maybe it wouldn't be that bad, but the loading time would be considerably longer than usual, so I passed on that opportunity.  That's ok, though, because I got some great stuff!


1 carrot cake cupcake - I love those things!
1 large bunch of small carrots - my daughter loves the small ones
1 jar of spaghetti sauce
2 cucumbers
3 apples - one of them is huge!!!
6 ears of corn
12 eggs
several sweet bunches of grapes

Let me say that last bit again, unless you missed it...

Grapes!!!

I miss my grapevines in the desert southwest so much.  I long for garden fresh juiciness, yet again.  I had hoped, upon finding a vine in the yard that definitely looked like a grapevine, that I wouldn't lose that, but alas, I was mistaken... again.

Seeing these grapes, near to bursting out of their skins due to the huge amount of juicy splendor within them, there was no hope of me saying no.  My salivary glands went into overdrive as I recognized that these grapes had superior quality and texture.  I turned my eyes away, knowing that I still had plenty of food left to buy.

My body, however, had a mind of its own.  

Even as my eyes turned to the right, the rest of my body turned left, refusing to move away from these juicy beads of luxurious flavor.  My treacherous feet lifted of their own accord, giving in to temptation, and blindly walking toward this forbidden fruit.  With all my effort, I tried to stop them.

"Mommy, grapes!!!" My daughter squealed in pleasure.

Et tu, Brute?  

My resolve was broken. 

I walked toward my tempter's table.  There was still a chance that I could walk away, though, so I asked the question that would give me the opportunity to do so.

"How much?"  Grapes are expensive, after all.  Nothing helps me break the bonds of temptation like hearing a large price.  Nothing.

"For five dollars, you get this much."  He waved his hand toward a very full bowl, brimming over with divine berries.

Five dollars isn't a bad price for the amount of grapes that he was showing me, but it was more than I felt justified in spending.  

That's one fourth of my entire farmers market budget, after all.  I felt my feeble control start to return.

"Sorry, sweetie,"  I told my daughter, "we still need to buy a lot more vegetables."  I turned away from the vendor's table, hearing her "Hmph!" quite loudly.

"Well, here..." replied the serpent at the table, "have a sample.  And one for your daughter, too."

Uh, oh.

Say no thank you.  Say no thank you.  Say no thank you...

"Thank you very much!"  I smiled and placed one of the grapes in my mouth, then handed one to my daughter.

With that one action, I doomed myself.

No more than five seconds later I was the proud, yet guilty owner of a glorious bag of grapes... and only had four more dollars in my pocket to use at the remaining vendor tables.

Oops.


Saturday, August 11, 2012

DIY: Plastic Kitchen Scrubber! Goodbye, Metal!

I hate metal kitchen scrubbers.  I mean, I really hate them.

I probably wouldn't be quite so vocal about this if I used cast-iron pots and pans, but who wants to carry something that heavy?

Not me. I have thin, metal pots and pans that were very well designed.  Heat is very evenly distributed throughout their surface, which gives me a very enjoyable cooking experience.  Not only that, but they're absolutely beautiful, in all of their glistening silver splendor.

::cue the evil kitchen scrubber of doom::

scrubber of doom


Metal kitchen scrubbers scratch my pots like crazy.  The perfect mirror reflection on the bottoms of my pans are practically gone, due to this tendency.  Scratches also work against you to hold food onto the pans.

Ugh!

But I figured out how to do away with these monstrous scrubbers, while reusing something that would normally just go to waste.

See, we have this habit in our family that's not particularly friendly to the environment.  We eat a lot of those long plastic wrapped popsicles. I should fill my own popsicle molds, yes, but I take the easy way out with this most of the time, even now.

I know... I'm contributing to the problem when I buy these.  I really need to do a complete switchover.  Even if I ignore that they're horribly unhealthy and filled with sugar, I also have to take into account that I'm helping place a lot of non-biodegradable plastic into the landfill.  It's far better to find a reuse for plastic, as I did with the soda bottles and the plastic grocery bags.

Popsicles in a plastic net bag


Fortunately, While I may be throwing out tons of plastic every time my daughter eats a popsicle, I've at least figured out a way to reuse the plastic net bagging that holds the popsicles.

I decided to make a plastic kitchen scrubber!

It's pretty easy, but does take some time, mainly because you need two of these bags to make a scrubber that's big enough to fit comfortably in your hand.  Alternately, you can use any plastic net bag that would otherwise make a one way trip to the great landfill in the sky.  Orange and onion bags are two examples that come to mind.

So what do you do?

Well, first you're going to need your supplies:

- scissors
- 2 plastic net bags

Pretty simple, right?  No extra string or strange tools.  Just the bags and a pair of scissors.

1.  Cut the top off of the bag.  That goes straight into the trash, of course.

2.  Now cut the bag into three equal sections, lengthwise.

3.  Now braid the plastic strips together.  I placed a small, heavy rock on the very top of the pieces in the beginning, just to be sure that they were easy to work with.

4. Tie a knot at the end of each side.

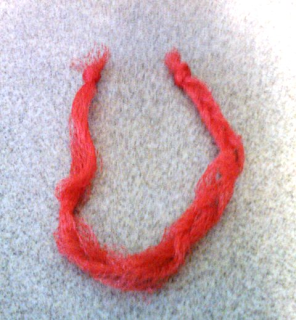
Braid made from a plastic net bag
The braid doesn't have to be perfect, as you can see.

5.  Repeat steps 1-4 with the second plastic net bag.

6.  Once both braids are completed, just spiral them around each other, loosely.  Tie a simple knot to keep them together.  Don't tie the knot too tight.

7.  Thread the remaining ends into this knot, being careful to make the design look clean.  Try to do this in a manner that holds a more circular shape.

No more knots are necessary.  The nice thing about plastic net bags is that they cling to what's around them - especially after they've been cut.

My result?

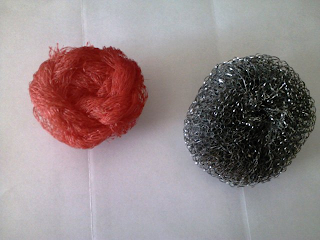
DIY plastic kitchen scrubber


Personally, I think the plastic scrubber looks much better than the metal one.

This photo was taken after I had already used it twice, and it held together just fine.  

I couldn't very well post about something like this without testing it first, right?

Not only that, but it took off all of the baked on grit that covered the bottoms of my pans... with no scratching.

Another bonus?  The plastic won't rust.  I know companies say that their metal scrubbers won't rust, but I've never found that to be true.  The metal scrubber in this picture already has a slight amount of it, and it hasn't been used much, at all.

While I know that scrubbers don't cost very much, having one that's free is way better.  The plastic scrubber also gave my popsicle bags a second life.  Upcycling, if you will.

Now if only I can figure out a way to reuse all of those clear-plastic popsicle tubes...

Any ideas?