Living during a pandemic means suddenly acquiring more boxes than you used to. Rather than going out to a physical store, you simply order what you want or need. Now add an infant into the picture.
Big boxes.
Little boxes.
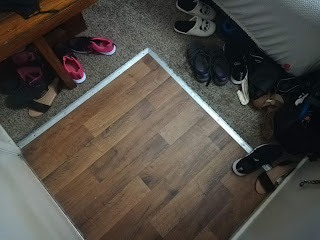
Boxes on the floor, under the table, even on an exercise bike.
The apartment is clogged with boxes, and the apartment community's recycling containers are always full, because everyone else has a cardboard clogged apartment, as well.
So what in the heck do you do?!
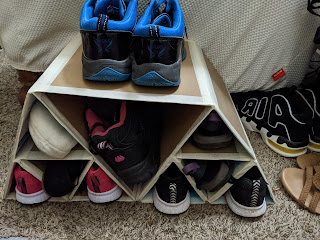
You build an architectural masterpiece... or, at least a much-needed shoe rack.
Well, ok... that's not exactly the way I decided on the idea. Rather, I went searching for things to create using cardboard boxes. I found stools, storage bins, race cars, all sorts of interesting projects.
The problem, though, is that I wanted to create something useful to me. While building things like a cardboard play kitchen or race car sounds like fun, they're not particularly useful ideas.
But then I found a post from the Family Handyman on ways to reuse cardboard boxes. The third item on the list was a gorgeous shoe rack! And boy, did I need it.
The idea was simple:
- Cut and fold pieces of cardboard into equilateral triangles.
- Use tape to secure the triangles.
- Tape those triangles together to form a rack.
Shoe Rack Approach Number One:
It just so happens that I can't fold cardboard into an equilateral triangle to save my life. Furthermore, Using the right kind of tape is extremely important.
It became clear to me that I needed to re-think my approach. Folding was not an option.
I now present you with Shoe Rack Approach Number Two:
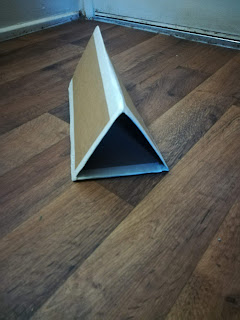
Cut cardboard pieces that are a decent length longer and wider than your foot. Make sure they're all the same height and width. Tape the three sides together to form an equilateral triangle.
This approach seemed to work at first, but then I discovered an issue: While my running shoes fit into the spaces marvelously, my hiking boots were a bit too large for the final shape.
Well, I cut several rectangles before making this discovery, so I couldn't scrap what I'd done - that would be significant waste.
Thankfully, opportunities are created when mistakes occur. This incorrectly sized result actually produced the perfect idea: Customizable shoe cells! Ok, that sounds weird. I know it does.
Let me explain.
Cut rectangles that are both longer and wider than your foot.
In my case, I chose to size them at 5.5" x 12" each, because that was the size of the first box flap I chose. Do this in multiples of threes.
Use tape to secure them together.
Now tape the cardboard triangles together.
Alternate the triangles' directions to get a solid row. This actually ends up as a very strong design.
Finally, customize your shoe rack.
Pay special attention to staying within your chosen size parameters. you can customize your shoe rack to create the number of rows you want, as well as specific row sizes and lengths. You can even mix and match the sizes to fit your needs.
As was previously stated, I measured without thinking about my boots. Obviously, this design would be horrible for me without customization... so I doubled the size of some of my rectangles to produce a larger shoe cell.
 |
| Slippers and light sandals are small enough to fit in a single triangle. |
So exactly how cheap is this?
Well, the cardboard costs nothing. Use what you have laying around. The tape is the only expense. I used multipurpose tape, which cost me $2.24.
This is great, but in the future I'll go ahead and add an extra dollar to that amount and buy some duct tape. Humidity was an issue for me, and I don't want a repeat. It allowed the tape to come loose in areas where it doubled over itself, weakening something that would otherwise be structurally sound.
There's also one huge, added benefit: I got rid of all of that clutter, and can finally use my vintage exercise bike again.
 |
| Score!!! |
Have you made a shoe rack using cardboard? Did you create one using some other material that you found laying around your home?
Please share your own experiences with us. Let us know what you did, as well as anything that you would change about your end result.


No comments:
Post a Comment