Wednesday, November 11, 2020

Is My Latest Shower Cleaner Really Green? The Borax Dilemma

I developed my latest shower cleaner after I ran the dishwasher... in 2013.

I just didn't know it yet. 

Seven years ago, I wrote about a dishwasher detergent recipe I found that used only 2 ingredients: Borax and baking soda. I loved it. Not only did it clean my dishes, but it whitened my dishwasher, as well. It was cheap, effective, and green.

Could this work in the shower, as well?

The answer, generally speaking, is yes. Equal proportions of baking soda and Borax are quite effective at cleaning a shower. Borax is a natural mineral that's ground into a powder. Its rough texture works well for scrubbing away soap scum. Both that and baking soda are salts, so they also increase cleaning capacity by softening the water.

I could see this effectiveness as I scrubbed the mixture onto the bath ledge. The white powder quickly turned gray, while the white became brighter.
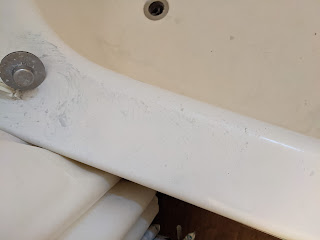
bath ledge with coalesced gray powder
It was pretty gross.

I was thrilled...

Until I noticed one problem.

Borax no longer had the same green support it had in 2013!

female stick figure screaming NOOOO!!!


When I tested the original dishwashing powder, the Green World was shouting Borax's praises. It was the green addition to any cleaning solution.

So what changed?

I went searching online, and most of what I found didn't change my mind about Borax. Multiple websites and blogs gave reasons for believing Borax was a bad choice, but none backed up their reasons with actual research. In fact, the vast majority simply linked to yet another blog that talked about the horrors of Borax... again with no evidence. 

I wasn't impressed.

Some screamed that Borax was poison. 
green bottle with a poison symbol on it holding green fluid with brown fumes coming out
Image via Pixabay

This, indeed, is a fact. One of its many uses is a pesticide, after all! 

I hunted down studies that specifically mention Borax within their trials, rather than boric acid (not even close to the same thing) or boron, and found that the mineral can cause harm in rats at extremely high levels. 

Of course, for that poison to affect someone, they would need to consume a large amount of it or at least coat their skin with it for an extended period. Since I don't plan on gargling with it or do I plan on using a Borax face mask, I'm not particularly concerned about this. 

Furthermore, there are plenty of poisons that are considered green. "Green" is not the same as "safe for human consumption," after all.

Of course, there's also open pit mining involved.

black and white drawing depicting mining machinery


This is pretty significant. 

At first, one might think that open pit mining is no more damaging than any other type of mining, and if you were solely speaking about human safety, you'd be correct. It's much safer for human workers than shaft mining since it reduces the chance of toxic gasses or cave-ins. It's also cheaper and more efficient than other methods. 

But that's where the benefits end. You see, open pit mining can have a significant impact on the environment. To quote Mission 2016: The Future of Strategic Natural Resources from MIT,

Environmental hazards are present during every step of the open-pit mining process. Hardrock mining exposes rock that has lain unexposed for geological eras. When crushed, these rocks expose radioactive elements, asbestos-like minerals, and metallic dust. During separation, residual rock slurries, which are mixtures of pulverized rock and liquid, are produced as tailings, toxic and radioactive elements from these liquids can leak into bedrock if not properly contained.

Unfortunately, if you continue reading to the end, it becomes abundantly clear that not just open-pit but all forms of mining are destructive to the environment. It does mention, however, that increasing government regulation to reduce damage would help and that programs companies enact to do this can actually pay for themselves.

Win-win.

Interestingly, 20 Mule Team, which is this nation's largest producer of Borax, has recognized this need. It works on reducing both water and energy consumption at its Rio Tinto mine. Hence, even though pit mining is environmentally damaging, steps are being taken to reduce that impact.

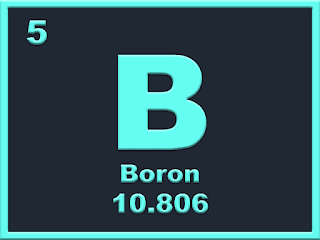
blue and black chemical symbol for boron, showing atomic weight

Further, boron, a key component of Borax, is also an essential nutrient that is sometimes used to help fertilize crops. In fact, 20 Mule Team brand Borax is approved by OMRI for use in organic farming in cases of soil micronutrient deficiency (Boron specific). 

So what's the verdict, then?

Ultimately, the decision, as always, is up to you. It depends on how much you trust the company's decision to work toward a sustainable future. 20 Mule Team has worked harder than most to produce a lower-impact mine, but there is still an impact. 

Open-pit mining is definitely a negative quality, but the flip side is that Borax is a much less toxic option than most cleaning products out there. Borax definitely works, so you'd be unlikely to waste any.

Personally, I'll continue to use it--in small doses. However, I'll also continue my hunt for a truly green shower cleaner that actually works well. Have I made a good decision, or would you choose differently? Why?

Monday, November 2, 2020

How to Prove You Slept Through Chemistry: My First Shower Cleaner Recipe Tested

I went through countless recipes, taking down website addresses and ingredients. I was determined to find something that would fit every requirement for the perfect shower cleaner. My fingers happily bounced across the keyboard, typing out ingredients, and then...

baking soda, vinegar, dish soap...?!

Oh, dear.

I recognized this recipe, and so, I imagine, did you.

Basic chemistry teaches us that baking soda and vinegar combine to create a fun little reaction in which you get a slight bubbling over of ingredients. I love to do this to clean my sink drain every couple of weeks.

But dish soap!

You probably remember that kid from the elementary school science fair: the one that took their time molding the perfect sculpture of a volcano, then added baking soda inside the "spout." They poured the fluid into the spout, and BAM!

volcano venting a lot of steam
Image by Julius Silver from Pixabay

A large amount of froth spewed out of the volcano sculpture. The adults all made impressed noises, and the kid got a B for effort because it was supposed to be an experiment, not a demonstration. We all loved watching that volcanic demonstration, though. 

So what does this story have to do with the recipe I discovered, you ask?

That fluid mixture was a combination of vinegar and dish soap.

I spent a few moments trying to decide whether the person that created this recipe was joking or if she slept through 3rd-grade chemistry. After perusing the page, I decided it was the latter. 

You see, the dish soap is what really made me pause. Even combining vinegar and baking soda doesn't faze me because the resulting bubbles are mild and short-lived. 

When you mix dish soap with vinegar, however, the baking soda/vinegar explosion becomes more potent. The more the dish soap blends with the vinegar, in fact, the more exciting the reaction becomes.

I was always careful to abide by science fair rules and never did the volcano demonstration. That left a gap in my younger self's experiences. Therefore, I decided to play with the ingredients and see just how big of an explosion I'd get. 

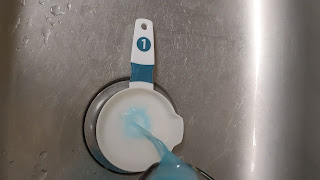
blue fluid being poured into a baking soda filled measuring cup


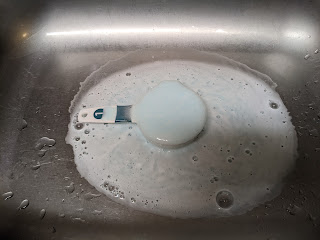
frothing white mixture covering a large area around a measuring cup in a sink


As you can see, this isn't a particularly good idea for a shower cleaner, but it does provide entertainment for yourself, as well as any children currently being remote-schooled in your home!

And speaking of children, I found a great article on Fun At Home With Kids that gives parents a great idea for how to teach chemistry to their young ones using a baking soda/vinegar demonstration--with dish soap! The author goes into detail about the science behind this reaction.

Now, don't use any recipes calling for this ingredient blend if you're planning to make shower cleaner, and stay tuned for my next shower cleaner test!


Monday, October 26, 2020

Is DIY Shower Cleaner That Actually Works Just a Hopeless Fantasy?

blue bottle spraying a clear fluid
Image by PublicDomainPictures from Pixabay

I
have an addiction to shower spray. 

This is not the same as being addicted to shower cleaner, however, and I think it's important to separate the two.

Shower spray is simple. You finish bathing, then you grab a bottle and spray the heck out of the walls, tub, and fixtures. You do this in the hope of not having to actually grab a sponge and scrub.

Unfortunately, this is a very expensive, wasteful, and futile addiction, and just like any other addiction, the end results don't match up to the dream. No matter how diligently you spray, eventually the tub and shower walls need a full cleaning again.

To make matters worse, finding a good shower spray is just about impossible during this pandemic. When I go to the store - any store - I have a choice of a) a store brand, or b) another store brand. 

While I swear by many of those for my staple supplies, shower spray is not one of them. I'm extraordinarily picky, because I don't want to waste any effort on cleaning any more than necessary. That goes double for actual shower cleaner!

I HATE cleaning!

bisque wall with white streaks with white tub walls below
Look at those gross, white, vertical
streaks on the wall!
Back when I had a tiled shower, it wasn't so bad. Tile is actually pretty simple to clean, and that includes the grout. But these apartment showers with spray-on resurfacing work?

They never come clean, regardless of what I use. My shower cleaning job has become an incredible hassle, ands the results of this torturous labor are subpar.

I know I'm not alone in this. 

Having worked apartment maintenance, I've seen what these showers look like when people move out after only 2-3 years, and it's not pretty. I also want to point out to you, if you're having issues with your own shower cleaning efforts, that it's most likely not entirely your fault. 

The resurfacing job done on most apartment showers in between moves is very nice to look at, but hard to keep clean. Companies give out a long list of what not to do when you clean them, but little  advice on how to clean them properly.

If you slack off, you're toast. It's that simple. Naturally, I couldn't effectively clean the shower for a few weeks, due to pregnancy and post-birth healing, so I ended up with a disaster zone. The right cleaner, however, could change everything.

That means I'm on the hunt, again. I want a shower cleaner that:

  1. Has earth friendly ingredients
  2. Is easy to make
  3. Uses few ingredients
  4. Doesn't cost a fortune
  5. Works well enough to make me stop whining.
I'm not sure this exists. Especially that last part. I refuse to believe a working shower cleaner is just a fantasy, however, so let's take a look at the requirements.

1. It's earth friendly.

Keep in mind, earth friendly and natural are not the same thing. Just because something is man-made, doesn't make it a terrible choice. I may be green, but I'm not crazy! 

2. It's easy to make.

This means that I'm not going to hunt down something that requires 3 different cooking methods and 5 hours to create. It needs to be done in under an hour, and not need a chemistry degree to accomplish.

two rows or vintage glass bottles with chemical names
Image by  Gerhard G.  from Pixabay
3. There are few ingredients in the recipe.

By few, I mean that it contains no more than 7 ingredients. Anything more is pushing things too far, and feels like a waste. 3-5 ingredients is ideal.

4. It needs to be cheap.

This needs to cost as much as, or less than, a large amount of shower spray.

5. It needs to produce a relatively pain-free cleaning experience.

This is done to kick a shower spray habit, so it needs to be something that I won't balk at doing. It must take a short amount of time to complete, and it needs to use only a little elbow grease.

Can this be accomplished?

I'm hopeful, but unsure. I succeeded when I went on my search for a DIY dishwasher detergent, and this success occurred after only one failure. This means that a shower cleaner that fits these specifications may exist. 

Have you discovered a great recipe for one? Leave us some suggestions in the comments, and I'll be sure to try them! 

Monday, October 19, 2020

How to Protect Your Baby from Microplastics

 It's scary, isn't it?

The idea that babies, in general, are consuming around 1.6m microplastic particles per day is enough to panic most parents, myself included. This number was reported in a story published in the Guardian this morning.

baby being bottle fed by a woman with a ring on her right hand
Image by Dirk (Beeki®) Schumacher from
 Pixabay

This number is significantly higher than the World Health Organization's estimate for microplastics in drinking water, a report published last year.

As it happens, the procedures used to ensure sterile bottles and formula blending actually contribute to this microplastic fiasco:

"The team followed international sterilisation guidelines to make baby formula in 10 different feeding bottles. This involves sterilising with 95C (203F) water, then shaking the formula powder with 70C water in the bottle. Both the hot water and shaking steps produced a lot of microplastics, which are far smaller than the width of a human hair." (Damian Carrington, The Guardian)

Yikes!

Fortunately, the scientists involved in the study theorized that adding one simple step to the end of the sterilization procedure brings this amount of microplastics down to a lower level. What's that step, you ask?

Boil some water, let it cool, and then use that water to rinse out the bottle a few more times.

copper tea kettle
Image by Ken Boyd on Pixabay

See? This really is a simple step. The water can easily be boiled and cooled while you're doing other things, which adds almost no time to your bottle sterilization process.

If this isn't enough for you, and you feel that even more steps need to be taken, there is always the idea of switching to glass bottles. They're definitely more environmentally friendly, and you don't need to worry about petrochemicals at all.

I'd like to point out, though, that glass is much heavier than plastic, which is really annoying at a 3:00 a.m. feeding. Also, babies like to throw things and bat them around. This means you'd have to be extra careful during feedings to ensure you don't end up cleaning shattered glass from the area.

Everyone wants to protect their baby from microplastics, but before you get a bit too worried about this new study, I want you to understand that this study was not evaluating whether this amount is dangerous for human consumption or not. And they also point out that many of the particles are automatically eliminated into their diapers.

The study does recommend more studies be done on the subject, but the authors want to be sure that nobody panics over this info.

And they're right. Panic does no good...especially when the authors don't know if this amount has any significant effect on human health. 

Instead, as parents, we need to focus on what we can do in this moment. Take that one extra step and you protect your baby by reducing the amount of microplastics consumed. 

And once you have that done, start pushing for new, eco-friendly options!


*You can read the study abstract for free in Nature Food.

Monday, October 12, 2020

How to Compost Like a Boss Without Spending a Fortune

 Long, long ago

In a garden far, far away,

There was a master composter

...

rectangular wooden compost bin, filled to overflowing

Image by Francis Ray from Pixabay


Ok, no. There was only me. But I was composting, so that counts...right?

Roughly 10 years ago, I created my own DIY composter. It worked pretty well, and I produced some killer compost. 

It smelled like gardening heaven...or at least high-quality potting soil. And it saved money on the next season's garden since I had no worries about buying soil or even fertilizer.

We're at the end of another growing season, so I'm beginning again. This time, though, I'm not building my own composter. The reason for the change is that my original composter was too small. I needed something much larger.

Unfortunately, good composters can cost some serious money. At least, that's how it feels if you're out of work due to a pandemic. In this case, you have 2 options: find an incredibly cheap one, or make your own.

Building Your Own Composter

If you choose to build your own, find a design that's easy to turn. A barrel, a paint bucket, or some other rounded container can be rolled, whereas different shapes require you to expend more energy and use additional tools. 

A rounded structure not only makes mixing the compost easy but also fun! I used to roll my compost bucket around the yard. It didn't need that much turning, of course. It was just an amusing way to enjoy the time spent.

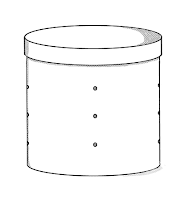
line drawing of a bucket with holes drilled
Also, make sure you incorporate holes for air. Oxidation is a must in any compost bin, which means you need good airflow.

If you don't care much about the aesthetics of your composter, a simple 5-gallon paint bucket and lid do the job in a pinch. That's how I created my first composter. 

Drill some holes in the 12:00, 3:00, 6:00, and 9:00 positions, about 3-4 inches from the bottom, and then drill additional holes vertically every 3 inches. Your mini-composter is now ready to be filled.


Buying a Compost Bin

Otherwise known as the lazy--and expensive--way. 

Also known as the way I'm doing it this time. 

I don't usually recommend or use this method, but a) I live in an apartment, so the composter can't take up much space, and b) I need something larger than a 5-gallon container. 

black hexagonal composter with a green sliding door
Buying one is pricey, especially during a pandemic. I was fortunate, though; I got my new 18.5-gallon composter, priced at under $100, as a gift. It allows me to turn the compost easily, thanks to its hexagonal design. 

Further, it's not ugly (which keeps the property management happy), it's sturdy, and it's one of the least expensive bins out there.

If you choose to purchase your composter and live in an apartment like I do, please be sure to use a blanket or tray to catch any water or dirt that leaks through the holes. This will save you from damaging anything...or dropping unwanted mess onto your downstairs neighbor's head!

Once you've chosen your compost bin, there are a few basics that you need to know to produce good compost.

You need to begin with a good blend of materials.

There are 3 material types to use:

Brown: These are items like your dried leaves, paper, and biodegradable egg cartons. The key here is that even though these items are organic, like the green matter, they are dry. They help ensure you don't have a wet mess stinking up your area.

Green: This is the somewhat fresh-ish plant waste, like fruits, vegetables, and wilted garden plants. Do not add meat to this mixture. It doesn't work well. Throw that in the trash or into the city compost bin if you have one. 

Dirt: Just plain old dirt. It can be last season's garden soil, sand, or silt. It doesn't matter, as long as it's dirt. Don't worry about the presence or lack of nutrients; you're producing your own in the bin.

Pay attention to your ratios!

The optimal ratio of these 3 components is 1-2-1. Basically, you want 25% of the blend to be brown matter, 50% to be green matter, and the last 25% to be dirt. The closer you get to these specific amounts, the better off your results will be.

Water is your best friend...or your worst enemy.

Pay close attention to your moisture levels. Too little water causes your materials to compost more slowly. Too much moisture, however, will contribute to rot, which is disgusting. 

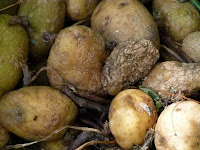
large group of rotting potatoes
Image by Steve Theaker from Pixabay
    And stinky.

        And stressful.

If you ever feel that you need extra water in your mix, err on the side of caution and use a hand mister, but spray only once into the mixture. Wait a few days, and spray again if you're still not satisfied. Trust me on this. Going overboard is the worst thing you could possibly do.

This, in a nutshell, is all you need to know to compost like a boss. 

If you really want to get things moving, then you can use a few additional tricks. Simply head over to my compost party post for some tips, along with more in-depth explanations about the process.


Monday, October 5, 2020

8 Terrific Reasons that Reusable Period Products Are Better than Disposables

Disposables:

They either make you feel like you're wearing a diaper or cause you to constantly check for leaks. 

At times they dry you out. 

Discomfort is a constant companion. 


Disposable period products are, as a whole, a complete tragedy, and yet we still use them. Fortunately, there are better options if you're willing to try them. Menstrual cups, cloth pads, and period panties are a few excellent examples.

a gift box with menstrual cup, cloth pad, and cervical cup inside
Photo by Vanessa Ramirez from Pexels


Back in 2012 I talked about my introduction to cloth pads. I loved them at first, because they were comfy, super-absorbent, and cute. Over time, though, they faded, becoming much less cute, and became less comfortable, as well.

But that was over 8 years ago.

Thankfully, today's reusable period products have come a long way. But what exactly makes them so much better?

1. They produce significantly less waste than their disposable counterparts.

To quote an article called Planet-Friendly Periods from Stanford Magazine, 

"In the United States alone, approximately 12 billion pads and 7 billion tampons are discarded each year." 

 That's a significant load of trash clogging our landfills, but reusable period products are a great way to decrease it. 

Menstrual cups, for example, last up to 10 years. This means that since a woman generally has 38 years

Monday, September 28, 2020

How to Build a Perfect Cardboard Shoe Rack on the Cheap

Living during a pandemic means suddenly acquiring more boxes than you used to. Rather than going out to a physical store, you simply order what you want or need. Now add an infant into the picture. 

Big boxes. 

Little boxes. 

Boxes on the floor, under the table, even on an exercise bike.

multiple cardboard boxes surrounding a vintage exercise bike

The apartment is clogged with boxes, and the apartment community's recycling containers are always full, because everyone else has a cardboard clogged apartment, as well.

So what in the heck do you do?!

You build an architectural masterpiece... or, at least a much-needed shoe rack.

Saturday, September 26, 2020

Can You Believe What California Just Did for the World?

plastic bottles, yogurt containers, bags
Photo by Magda Ehlers from Pexels

 "Hey, check this out." My boyfriend began reading to me from across the room. "California passes first in nation plastic recyc-"

"And?" I rolled my eyes. I was still disgusted, because plastic recycling isn't nearly as helpful as we've all been led to believe. "Unless we force companies to use recycled plastic at a decent rate, it won't really matter how much we throw into the recycling bin."

"'...requiring plastic beverage containers to contain an increasing amount of recycled material.'" He plodded on, ever patient.

"Wait, what?!"

It turns out that he was reading about recycling legislation that truly is first-in-the-nation. 

On September 24, 2020 Governor Gavin Newsom signed Assembly Bill No. 793 into law. It states that beverages sold in plastic containers must contain a specified amount of post-consumer material, effective January 1, 2022.

What are those specified amounts? There are actually a few different levels that will be added to the Public Resources Code, increasing by date.

  • January1, 2020 - December 31, 2024: at least 15% 
  • January1, 2025 - December 31, 2029: at least 25%
  • January 1, 2030: at least 50%
An overwhelming amount of plastic is ending up in our waterways. The knowledge that one state is demanding that companies do something to curb that devastating waste makes me feel hopeful about plastic recycling yet again. 

California is the first state to do this, but many more may follow in its footsteps. Which do you think will be next?


Monday, September 21, 2020

How to Stop Wasting So Much Energy + Save Time and Money

steaming pot on a stovetop
Photo by cottonbro from Pexels

Whether anybody likes to admit it or not, we Americans are energy hogs. As a maintenance tech, it seemed like every apartment I walked into had every electrical outlet in use, complete with surge protectors. 

I've lost count of how many times I had to explain that there was nothing wrong with a person's electrical lines. They were simply drawing more power from a single circuit than it could handle. When that happens- Zzzt! The power goes out.

Quit overloading the circuits!

Obviously, the above situation costs a great deal when energy bills come around, but that's not where you find a home's worst energy consumption. And don't worry, I'm not going to tell you to wrap up your water heater, or buy a new one, either... even though it would help.

Instead, let's talk about the kitchen.

In particular, I want to talk about how we prepare food. Since gas stoves/ovens use natural gas to heat, I'm not going to talk about them... it's pretty obvious that they're not doing the Earth any favors. Plus, my professional and personal experience mostly deals with electric.

Electric kitchen ranges draw insane amounts of power to do simple tasks like boiling water for ramen. Now, I haven't gotten rid of my oven, and I still use it sometimes. I've simply reduced my usage. 

Significantly.

So how did I reduce my own electric bill, thereby saving money and reducing my carbon footprint at the same time?

It was easier than you think, and I'll tell you how (and why) to do it.

Use a modern pressure cooker.

Don't go and grab the pressure cooker that your grandfather stored in the garage 2 decades ago. Those old ones are dangerous.

Instead, get a modern pressure cooker. While I have an Instant Pot, there are many others that are just as good. These modern beauties reduce cooking time and consume less energy than an oven or stovetop. Sometimes they even produce better results for those of us don't have a culinary degree.

Their energy savings are pretty significant. As an example, I'll do the math for both an electric oven and my 6-quart Instant Pot. The calculation is as follows:

(Appliance wattage) / (number of hours in use) = watt hours per day

(watt hours per day) / 1000 = Kilowatt hours per day, or kWh

If we want the monthly amount of energy used, though, we must take it one step further.

kWh * 30days in a month = kWh per month

In an oven, it takes me an hour to bake a 5 pound chicken, plus an extra 15 minutes for pre-heating. 

With my pressure cooker, the same chicken cooks for 25 minutes with a 15 minute pressure build-up time. There's also a 5 minute quick-release of pressure (I get impatient).

Roast chicken sitting on a bare wooden surface with a spoon and fork on either side
Photo by Lukas from Pexels

To do the calculations, I'll use the average oven wattage of 2400 watts. My Instant Pot uses 1000 watts. I'll also assume that my cook times are the same every day for a full month for both devices.

When plugging all of these numbers into the equation, we get a total of 57.6 kWh when using the oven for a full month. The pressure cooker uses only 40 kWh each month. 

As you can see, this is an energy savings of roughly 31%.

Or even better, use a microwave.

I know what you're thinking... microwaves are for reheating, or for quick, tiny, pre-packaged foods. You used to be right.

But not anymore.

Today you can find countless microwave recipes that are both tasty and healthy. The microwave is faster than either the oven or the pressure cooker. In fact, a small one uses approximately 600watts, so you're talking about mega-savings.

Of course, a small microwave won't cook a chicken, but you win some and lose some, right?

But!

Perhaps you're really not interested in changing your cooking method.

No worries. you can still save energy and money by taking a few more quick steps.

Quit opening that oven door!

I know how difficult this can be, especially if you don't have a window on your oven. My own is like this. But try to hold back. 

You see, every time you open that oven door, you decrease the oven temperature. This decrease can be as much as 150 degrees! That means you need to wait even longer to eat, because the oven needs to get back up to the proper temperature.

So please, for the sake of your hungry family, just leave it closed.

A worn, off-white, vintage oven with the door half open

Clean your oven.

A clean oven is a happy oven. No, really! Cleaning an oven makes the heat distribute more evenly. The result? Better energy efficiency. 

And while you're at it, keep the burner pans clean, as well. They reflect heat back at your pan, helping your food cook faster. Score!

Match the proper pan size to the correct burner on your stovetop.

This is a big one that many people never consider. If you use a large burner to heat a small pan, you're wasting more energy than necessary. Much of the heat goes out into the surrounding air, rather than just the pan.

Use your lids.

While you can't really do this if you're frying up something crispy, using the lid helps you build up heat faster, and retain that heat, as well. In fact, I'm always able to keep water boiling after placing a lid on a pot and reducing the heat to medium. Think about what that means for energy reduction!

Reducing our personal carbon footprint is so easy!

Not only are these all simple tasks, they also save you a great deal of money in the long run. Some even save you a significant amount of time. 

Of course, there are many more ways to reduce our energy consumption in the kitchen. I've only listed a fragment of them. Add your own in the comments below and help make us all a little greener!

Monday, September 14, 2020

Save Money and the Environment by Spicing Up Your Garden


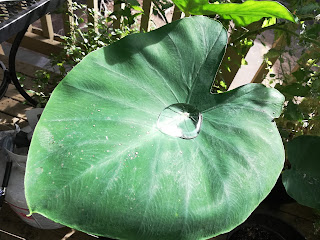
single large leaf holding water, potted taro plant

"Ask your uncle if you need any oregano. I've got too much over here." I smiled at the neighbor's nephew and waved while holding a few sprigs of the aforementioned herb.


"Ok, I will. It's like you have a whole big garden over there, or something!" He responded with amazement.


As I looked back at all my plants, I understood what he meant. He didn't actually mean a garden. It doesn't take many plants to call something a garden. What he meant was that it was like I have a whole farm on my balcony.


And he's not wrong. My apartment balcony is home to 25 different plants. All of them are edible, with the exception of one. Don't worry - nobody wants to eat my tiny azalea bush. Fruits, vegetables, and herbs transform my balcony into a mini forest, complete with its own pint-sized eco-system.


What we're focusing on today, though, is the herbs.


At first, gardening doesn't seem like a process that would save you money. Seeds sometimes cost more than the produce that you buy in the grocery store. I'm talking about you, Mr. Bell Pepper Seed that only gave me 2 ping ping ball sized fruits! 

And buying young plants at a nursery? You can spend less by getting your herbs in bulk at the grocery, depending on the variety.


But!

If you do it right, you become victorious.

One corner of a balcony garden overflowing with plants

Welcome to the Jungle!

Ok, not all of that is herbs. You get the point, though. A small amount can transform your garden into a chef's dream, with perfectly grown spices just waiting to be plucked for your next meal.


How does this save money, you ask? The trick is to choose the right herbs. 


Only Plant What You Plan on Using

Yes, I know this seems obvious, but you'd be surprised just how often you go to buy basil, but come out with chives, peppermint, stevia... and basil... in 3 different varieties. It's important to think about what you use. Don't distract yourself with all the other seeds that are calling out to you in their sweet, dulcet tones.


Choose Perennials When Possible

These herbs are the givers of the plant world. Every year you prune then, snip them, constantly remove sprig after sprig, and they keep coming back for more. They're a one-time expense, which means that even if you spend a decent amount of money on one, it'll pay for itself after a season or two.


Only Pick Annuals if Saving Their Seeds is Easy

A good annual for your herb garden is one that enjoys spreading its seeds all over its pot. Plants with this characteristic ensure you have a good supply growing every season. 

Most basils are annuals. So are cilantro and dill. The hardest part of caring for these herbs is having the patience to wait for a sprig or two to go to seed.


Growing your own herbs is a small step toward protecting our environment, as well.


How, you ask?


Think about how many miles the herbs you buy in the store have to travel. Most dried (and even fresh) herbs aren't sourced locally. The gas (or diesel) used to get them to your table weighs on the atmosphere, contributing to global warming. That's not all, though. 


Consider the packaging. Most of the time, herbs are packaged in plastic containers, or glass containers with plastic lids. I don't think you need to be reminded about the many problems associated with plastic production, or plastic waste.


plastic bottle on beach. Photo from Catherine Sheila, Pexels
...but I did it, anyway.

By planting your own herb garden, you not only save money over time, but do your part to save the Earth in the process. What could be better than that?

Plant that garden, and let me know what you plan to put in it. You may give me an idea for expanding mine in the future!

Monday, September 7, 2020

How Broken Glass Made Me More Eco-Friendly

broken wine glass on bare tabletop
Image via Pixabay

In less than 24 hours, everything was moved out of my old apartment and into the new. The move was exhausting, and we didn't get much sleep, but it was done.

In fact, I was proud of myself this time. You see, I managed to get every box labeled by room, even though I wasn't the only one packing. It was the move to end all moves. Fast. Organized. Perfect.

But then I opened that box.

When I lifted the box labeled "KITCHEN: glasses and bowls", I heard an ominous

    Clink 

         Clink

                Clunk

and I knew I was in trouble. I opened a box and lifted a towel to find glass fragments twinkling up at me. Half of my drinking glasses were broken.

Well, so much for a perfect move!

At the time, I was having some money issues, so buying a brand new set of drinking glasses wasn't an option.

I stared at the bottle of coffee on the counter.

You know the type of bottle I'm talking about: the prepackaged, pre-mixed coffee sold by companies like Starbucks. This particular brand had an easy to remove label. That wasn't the only part of it that made me smile, however. I also realized that it held the same amount of liquid as my broken glasses were created to hold.

I loved this cold coffee, which meant that I occasionally bought it for myself as a special treat. Now, though, it was useful as well.

I collected all the glass coffee bottles I bought, removed their labels, and washed them. Within a few months, I had a full set of drinking glasses, again. I continued, saving other glass containers that held food or drink products. Finally, I was able to store most of my leftovers in glass, rather than plastic.

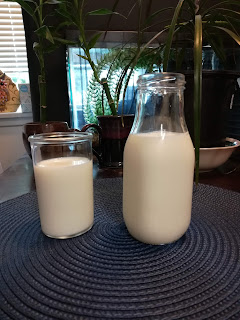
Tube shaped glass of milk on left, standard wide bottle on right, also holding milk
Rice seasoning container on left, coffee on right


Plastic is made using petrochemicals, and has a very high chance of releasing toxins into your body if it becomes unstable through overuse or overheating. Glass, though, remains safe and non-toxic. That's not all, however.

Choosing to re-use your glass containers is both eco-friendly and frugal.

Take my forced re-usage as an example. 

Glass containers can be re-used and repurposed in multiple ways.

You see the photo of my new drinking glasses above. However, I also have a half-gallon milk jug that I use for iced tea, a salsa bottle that holds half & half, a chili oil jar containing pens and pencils, and so much more. 

If you imagine a new purpose for your glass, you can bring that vision to life.

It's not only cheap, but saves money, as well.

Think about it. Yes, you do have to buy the container, but you're not going out to buy some glass. You're buying pizza sauce, or salsa, or something else. It just happens to have a glass container. This means that many of your home purchases are non-existent.

Food grade glass is stronger than you think.

That's probably the one thing I constantly hear about from people. 

"It's so strong!" "This is stronger than my glasses at home!"

These containers withstand constant movement. They are stocked and re-stocked, customers pick them up, put them down, pick them up again, and drop them into their carts. They take a serious beating.

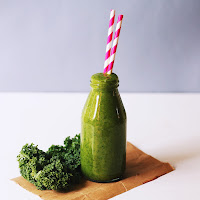
glass bottle holding a green smoothie with a red and white straw
Photo by Alisha Mishra via Pexels

It's guilt free.

You're not contributing to the plastic islands floating around our ocean. If your glass container breaks, you can throw it out without fear of putting toxins into our environment. 

Not only that, but if you simply get tired of it and dump it into your recycling bin, there's no guilt. Not only are you recycling it, you've also re-used and repurposed an item. Talk about eco-friendly!


You have a great conversation starter.

Whenever someone comes to my home for the first time, they'll hold up the glass bottle of water that I hand to them, and examine it with curiosity. They always want to know more about it, and many start re-using their own glass containers. Some talk about ways that they or a family member have repurposed glass in the past.

With so many ways to both save money and be eco-friendly simply by choosing not to throw out a few used food containers, everybody should want to. In what ways have you repurposed glass containers?


Monday, August 31, 2020

How to Save the Environment With Ease at Every Meal


"Hey, can I have a napkin?" My friend yelled at me from the kitchen.

"Yeah, just grab one. They're on the counter." I responded from the other side of the house. I was dealing with my screaming toddler, and if left to her own devices it was unlikely her high-pitched voice would soften any time soon.

"No, they're not. There's nothing here!" The increasingly frantic voice called out again.

"Alright, hold on..." I grumbled, picked up my daughter, then walked into the kitchen. There was iced tea dripping from the counter and onto the tile floor. I grabbed a napkin from the table and held it out to my friend.

"Wait, that?!" She squeaked in confusion.

"Yes?" I replied, checking to see if my green cloth napkin was soiled, or if a spider was crawling on it.

"But that's... fancy. I can't use that!"

This incident occurred roughly nine years ago. Similar exchanges still happen from time to time. Apparently, one should only use cloth dinner napkins for fancy occasions.

I didn't get the memo.

In fact, I've used cloth table napkins for more than 11 years, and I've used them at every meal. Indeed, they make more sense than paper alternatives. Why, you ask?

Less Waste: They last years before they need replacement. 


Data published by the Statista Research Department shows that approximately 241.33 million Americans used paper napkins in 2019.  
Let's say that each person used only one 400-pack of paper napkins per year. This equals out to less than 2 napkins per day, at roughly 1.76 pounds per year. 
That's 424.74 million pounds of napkins filling landfills every year! And remember, this estimate figures in at less than 3 meals worth of napkins in a 24-hour period. I'd say that estimate is pretty conservative.
In contrast, cloth napkins add nothing to the landfills for years. I've only tossed one in the past decade, and only because a faulty washer shredded it.

You have a variety of textures and colors to choose from.

Are you in the mood for smooth and green, rough and white, soft and paisley? Do you want cotton, bamboo, hemp, or polyester(yuck)? Casual or fancy? Search long enough and you'll find exactly what you're looking for.

They take up a negligible amount of space in the washer.


This means that switching to cloth napkins produces no noticeable added energy consumption. A week's worth of napkins takes up the same amount of space as a pair of pants, or less, depending on how many you use. I never noticed a difference in my own laundry frequency after I switched to cloth napkins.

It's easier to clean away sticky food and grime with cloth than with paper.


Do you like chicken wings? Perhaps toast with jelly? I'm a huge fan of sticky and oily foods. I know, I know... it's not the healthiest choice I can make, but who doesn't enjoy the occasional fatty food? Fortunately, I don't have to worry about picking pieces of stuck-on paper from my fingers. Cloth napkins are way more durable than their disposable counterparts.

It's way cheaper than using the paper stuff.


While I bought my first pack of table napkins at a retail store (probably Target), The rest came from a second-hand store, costing less than $2 per pack. Each pack had about 4-5 cloth napkins within it. Remember, I have used these for over a decade, and I'm not a particularly delicate person.

You get to tell people amusing stories about your friends' reactions.


I don't need to explain this one. That friend I talked about in the beginning wasn't the first person confused about my decision to use cloth napkins, and she wasn't the last. Once people get over that initial shock they adapt. In fact, many express newfound interest in the subject!
Think about it. Not only is it an easy money-saver. It's also one way to do your part to save the natural environment from a growing problem. Human waste disposal.
These are just a few ways that cloth napkins save the environment while also saving money. I'm sure you can think of several more. List them in the comments below!