I had a lot of leftovers of various types, and I really wanted to use some of them up. I've been doing a decent job in terms of main dish portioning, so leftovers in that regard were minimal.
But what about all of those side items? What about those simple ingredients that take up so much room and are rarely used at all?
I was on a roll, and I wanted to do more. More. MORE!
So I thought about those pre-prepared meals that I dislike so much. I still buy them, I admit. I just kind of crinkle my nose at them as I get them out of the freezer. Some of them are pretty much staples in my home.
Like chicken nuggets.
My daughter loves them, and because of this, I can be assured she'll eat her lunch no matter how she's feeling. But I hate the things. Indeed, there's only one brand that I'll ever buy, because nuggets are often loaded with fillers. If that one brand is not in the grocery store when we're there, nuggets don't get bought.
Period.
So I decided to do something about it:
I bought a meat grinder attachment for my KitchenAid stand mixer, and swore to use it.
And I did.
And it was glorious!
I found:
- those breakfast cereal crumbs that nobody ever eats, because... let's face it. Crumb texture just feels nasty in the wee hours of the morning.
- leftover stuffing cubes
- old bread
I had everything I needed for a successful nugget, I decided! After grinding the cereal crumbs and stuffing cubes into a nice, fine powder, I added a couple of tablespoons of flour.
I blended them together, and then set them aside. It should be noted here, though, that I didn't worry about adding any spices or salt - I used stuffing mix, after all, which is already highly spiced.
I then went on to the chicken breasts, which I put throught the grinder twice - I needed to ensure it was ground into a big pile of smooshiness, after all.
I have to admit to a rather large amount of goofy joy, here... there's just something about watching something of one shape go through a machine and come out looking entirely different that just kind of makes me giggle. Go figure, right?
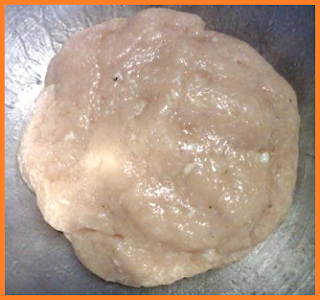
After that, I added a bit of pepper, as well as some salt. 1 1/2 tablespoons of my organic canola oil completed the blend. I kneaded it until it looked like something out of one of those documentaries talking about pink slime... only not pink.
It looked absolutely disgusting...
Which meant it was ready!
I baked these nuggets, but I wanted to ensure that they had that typical frozen chicken nugget look to them, so after pressing small balls of meat mixture into oval shapes, I dropped them into a blend of the canola oil and water (No, water and oil don't mix, but they don't have to. This was just a way for me to ensure I got the meat properly moistened for breading without going overboard on the oil). I then covered them with the breading mixture I had set aside.
Finally, after coating several in this manner, I dropped them onto the pan.
I went through a few taste tests before finally deciding on a balance of flavor that I enjoyed. One thing I noticed was that nuggets require a lot of salt. I mean, actually ended up adding salt to the nuggets once they were all on the pan.
Crazy, right?
In the end, though, I came out with something that both my daughter and I approved of, which earns me about 500 mommy points, I think.
I was rather excited, as well, when I saw how similar they looked to the chicken nuggets you find in the store (The nuggets that actually have a decent amount of meat in them, that is).
And now, let's talk about the cost!
Because I simply found breading materials that were already in my home, I only needed to spend money on the chicken meat:
$2.63
The chicken was not on sale, yet I was still able to create all of this...
 |
| Add another four nuggets to this... I was taste testing, after all! |
...for less money than the pre-packaged equivalent. Keep in mind that while you can find nuggets that cost less, there isn't much actual chicken inside those - they're mostly filler.
Now, you could make nuggets without grinding the meat. That's the easier method, after all. I chose to use this method, however, because I wanted it to appeal to my four year old daughter.
And honestly?
It's just as good. Grinding gives you the texture and moisture of something along the lines of McDonald's or Wendy's. Chunks give you more of a Chick-fil-A feel.
Of course, since you were the one that made it, it tastes better, anyway... and you know exactly what is inside.
And you've used extra foodstuffs from your kitchen that you otherwise may not have!
Score one for the environmental team!
Ok, so here's the basic "recipe", in a nutshell. I use the word recipe loosely, because we all know I can't measure things out to save my life:
Breading Ingredients:
crouton stuffing mix
old bread (to make bread crumbs)
flour
leftover breakfast cereal (make sure it's an unsweetened variety, or you'll regret it)
Chicken Ingredients:
salt
pepper
chicken breast
cooking oil (set aside some extra cooking oil for coating)
Instructions:
- Preheat the oven to 350 degrees.
- Grind up the old, dried out bread, cereal leftovers, and the croutons(You can add a bit of Italian seasoning if you really want to, though I didn't), then set it aside.
- Grind up the chicken.
- Mix the chicken, salt, pepper, and cooking oil together, adding just enough of the oil to make the mixture feel a little extra sticky... and look a bit shiny. For the salt and pepper, just use your judgement.
- Make tiny balls of the meat mixture (Maximum of an inch in diameter), then mold them into a fat oval shape (Making them fat helps retain moisture... don't flatten them like a pancake).
- Grab that extra cooking oil and add some water to it. Shake or stir. The stuff looks gross, and doesn't actually blend, but that's fine.
- Plop one of your ovals into the oil, then take it out and coat it with the breading mixture you set aside.
- Repeat for each one.
Once everything is happily coated, stick it all in the oven for ten minutes total. At around 8 minutes or so, take the nuggets out to flip them over. This part isn't absolutely necessary, but it makes them look a little nicer, so I say go for it.
Easy, right?
Go find some old materials that can be used as breading, and make those chicken nuggets! It doesn't have to be just like mine, after all... Old Doritos would make for some interesting cheesy coating. dried coconut flakes mixed with old cinnamon bread could be kind of yummy, too...
Use your imagination, and create a masterpiece!


No comments:
Post a Comment